
Postiz 是一個用來排程社群媒體內容的工具,並且主打可以用 AI 輔助內容產生和數據分析!
最特別的是,還有開源的版本可以自己部署。
而部署的好朋友 Zeabur 也提供了一鍵部署的模板來使用。
那用 Zeabur 來部署 Postiz 的話
就會有些設定需要自己處理
以 Threads 來說,就需要設定好自己的 Meta Developer 並且取得 app_id 和 app_secret 來串接
這裡來詳細介紹 Meta Developer 設定 Threads 的流程:
Postiz 串接 Threads 流程
1. 建立 Meta 應用程式
首先前往 Meta for Developers 並點擊「Create an app」建立新的應用程式。
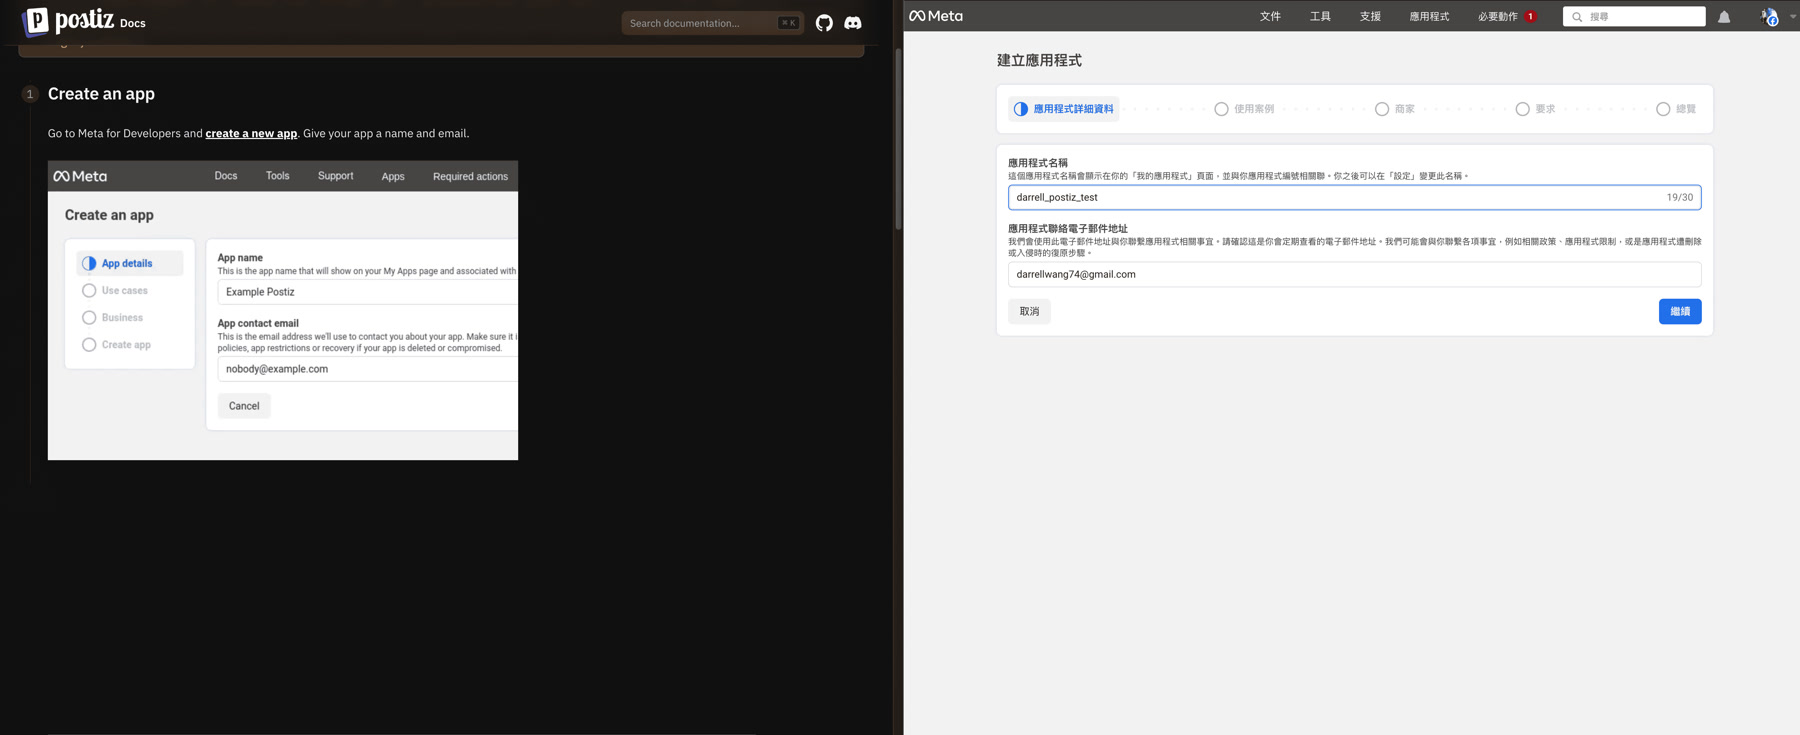
在建立應用程式時,需要填入應用程式名稱和聯絡信箱。名稱可以自由決定,建議使用容易識別的名稱。
2. 申請 Threads API 存取權限
接下來選擇「Access the Threads API」,這是使用 Threads 功能的必要權限。
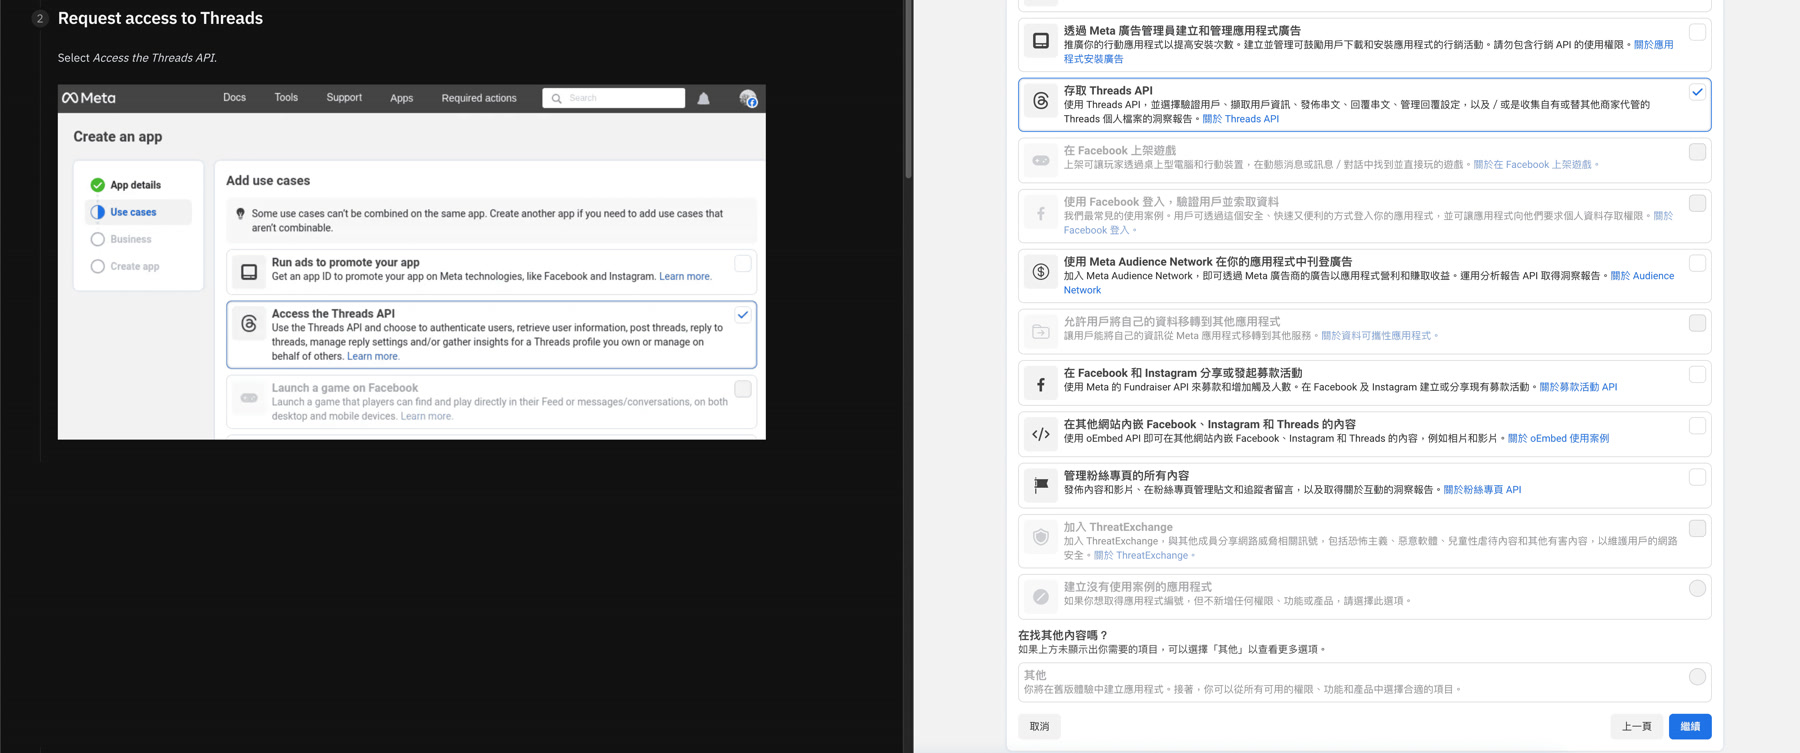
系統會顯示 Threads API 的各種權限選項,確保勾選「Access the Threads API」後繼續。
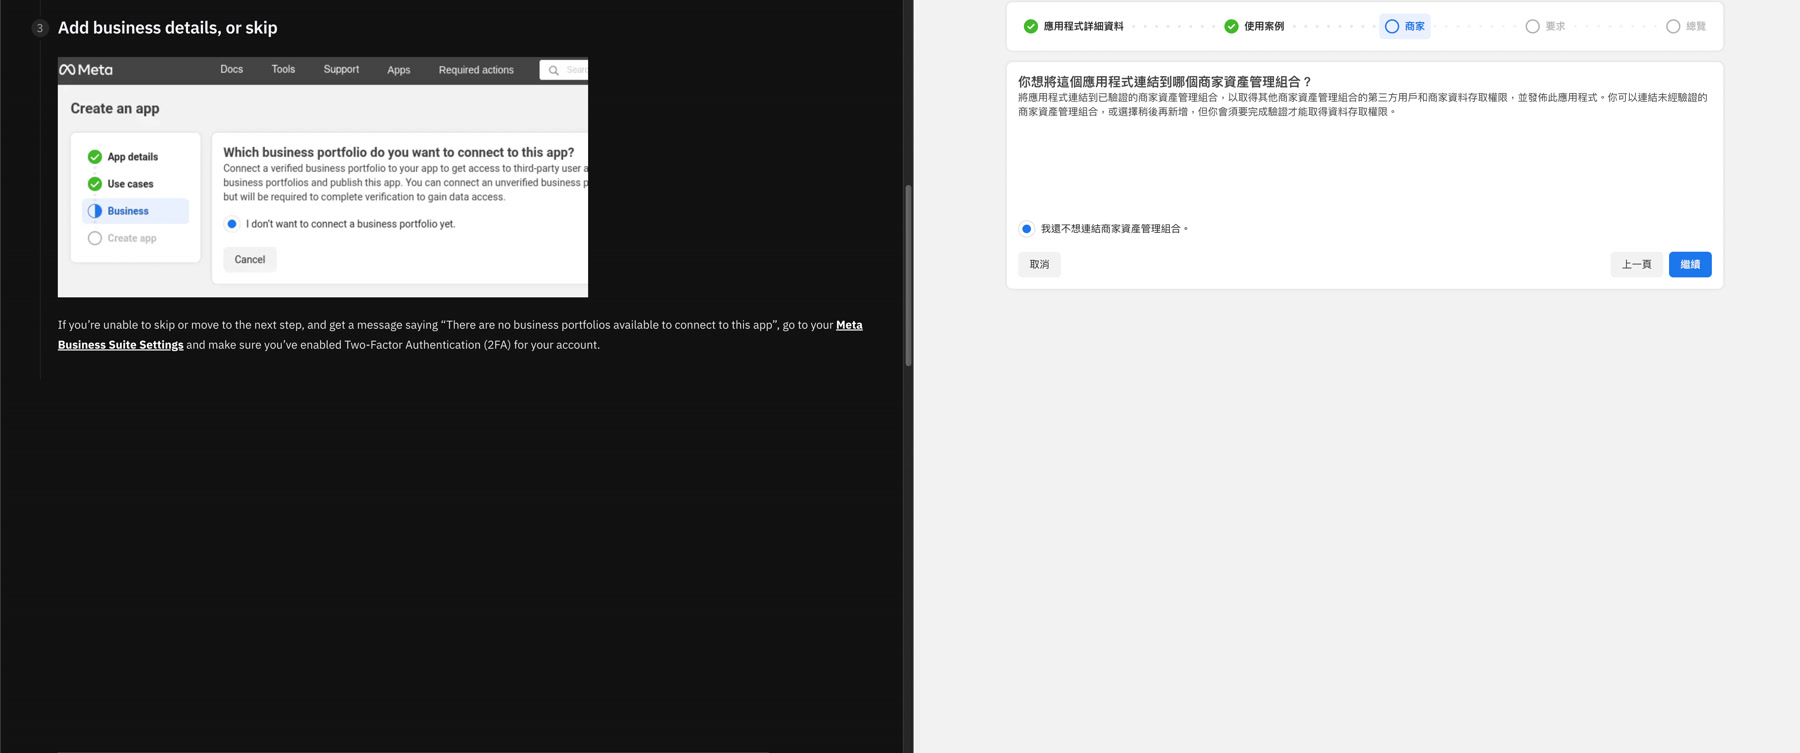
3. 跳過商業檔案連結
如果你沒有 Meta 商業檔案,可以選擇「I don’t want to connect a business portfolio yet」跳過這個步驟。
4. Review 應用程式建立
確認都沒有問題後,就可以完成應用程式的建立。
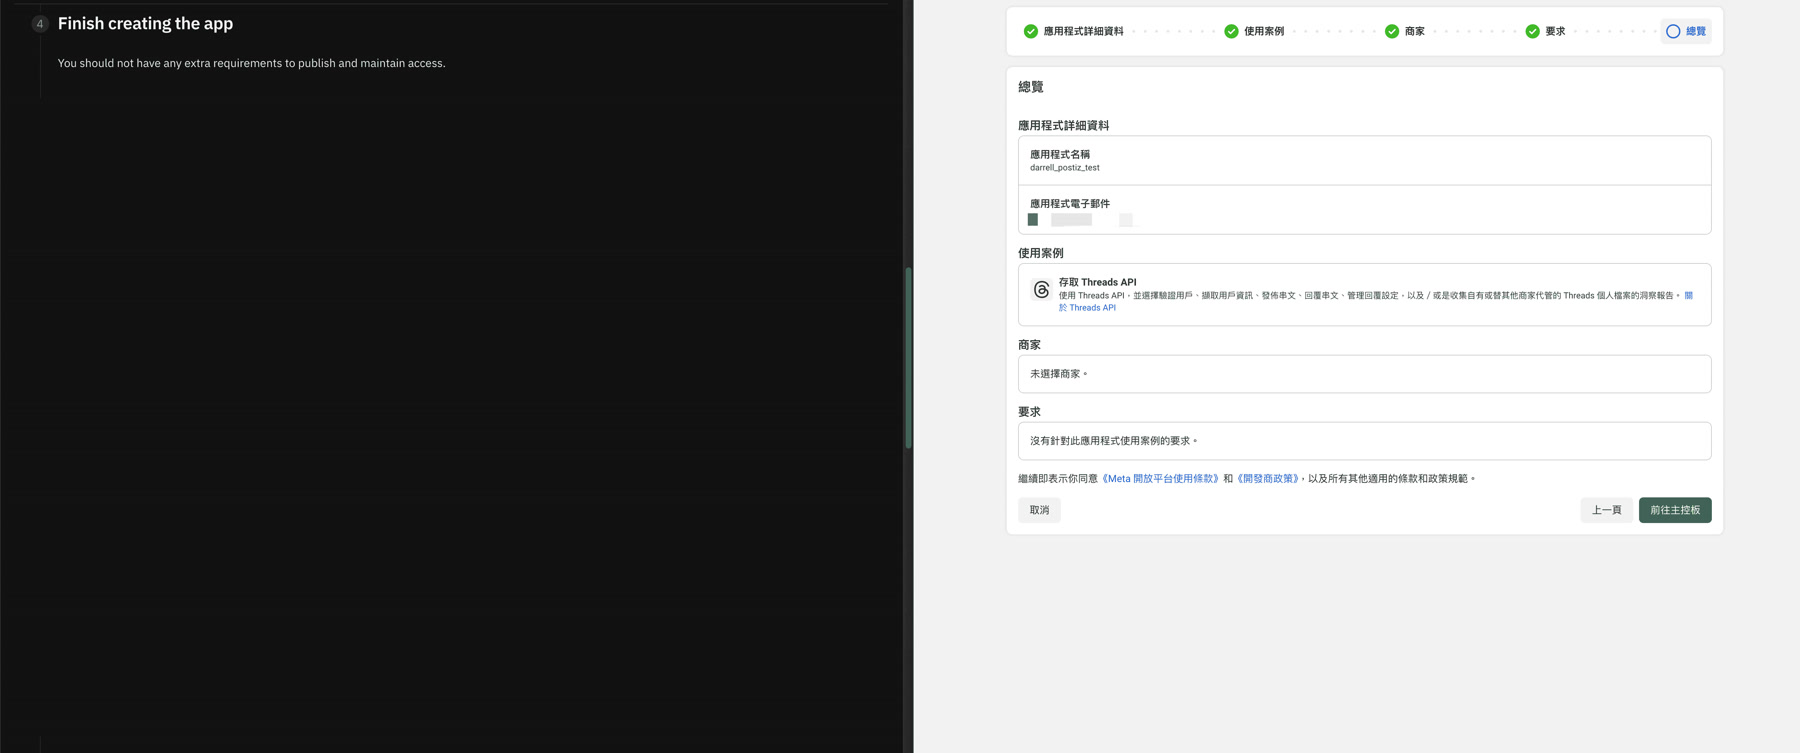
此時可以看到應用程式的基本資訊,包含名稱、使用案例等詳細資料。
5. 主控板
進入應用程式的主控板,點擊 自訂存取 Threads API 的使用案例

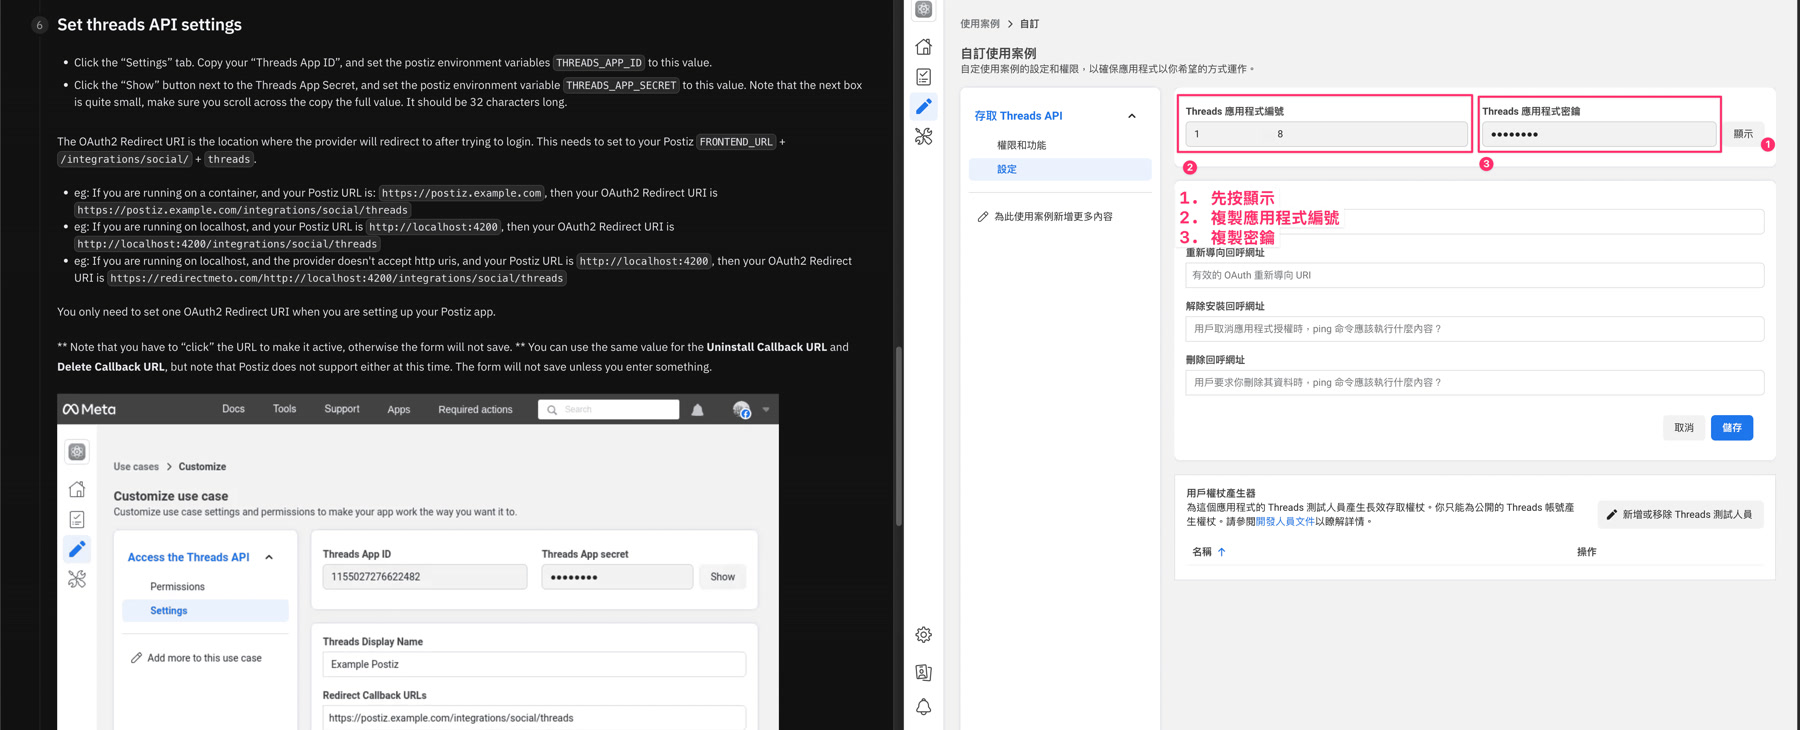
6. 設定 Threads API 權限
在權限設定頁面中,需要勾選所需的 Threads API 權限
- threads_basic
- threads_content_publish

7. 取得 App ID 和 Secret
進入設定頁面,可以看到 Threads App ID 和 App Secret,這兩個是連接 Postiz 的重要資訊。
8. 在 Zeabur 設定 Threads App ID
將從 Meta 取得的 App ID 複製後,前往 Zeabur 的環境變數設定頁面,新增 THREADS_APP_ID 變數。
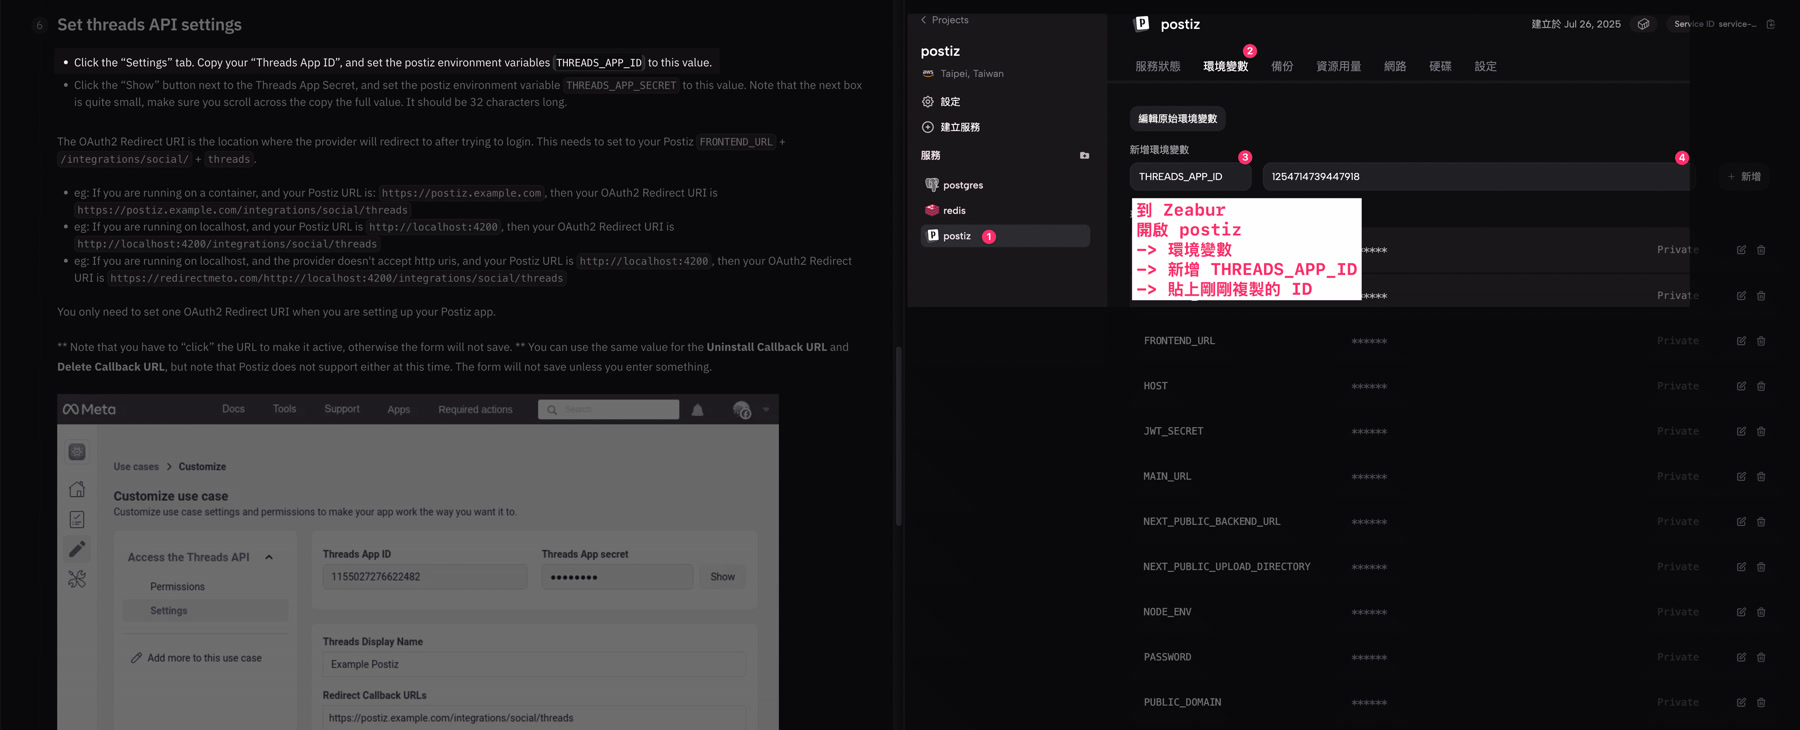
確保 App ID 正確貼上,這個 ID 是應用程式的唯一識別碼。
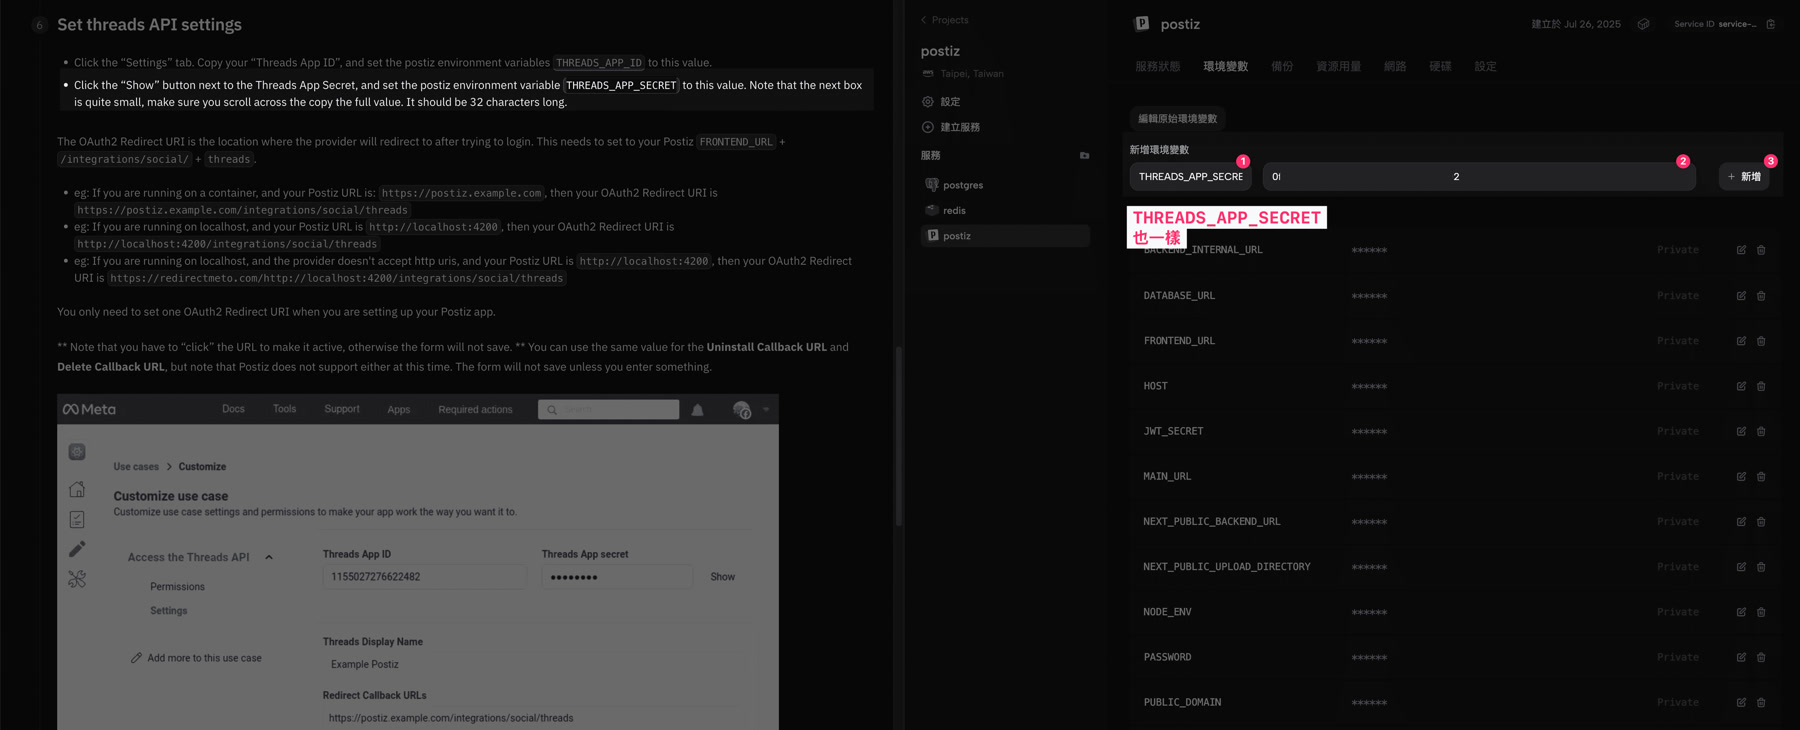
9. 在 Zeabur 設定 Threads App Secret
將 App Secret 複製並新增為 THREADS_APP_SECRET 環境變數。
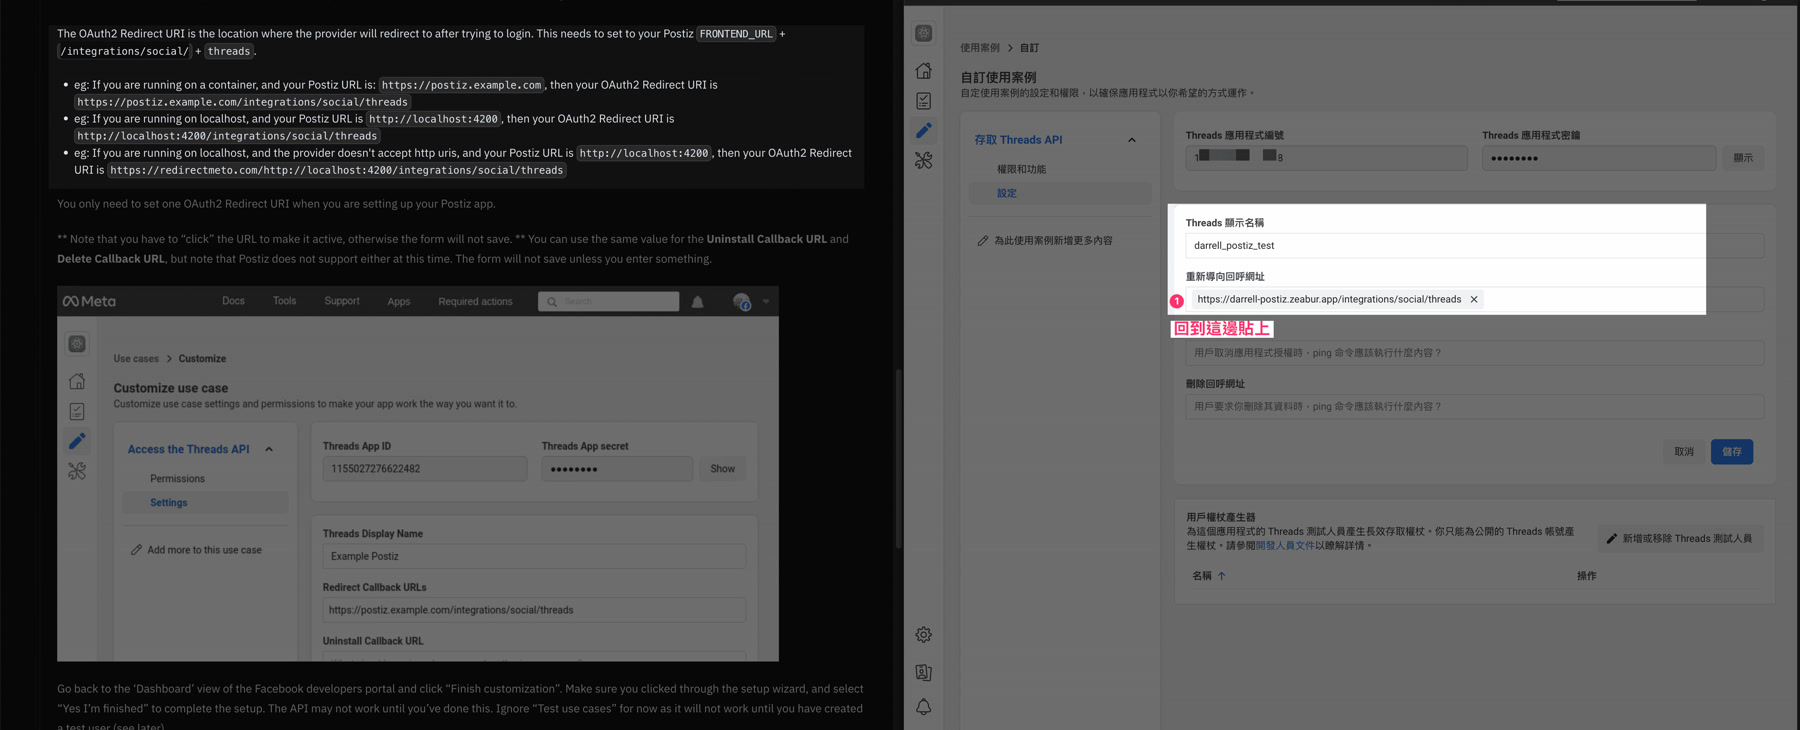
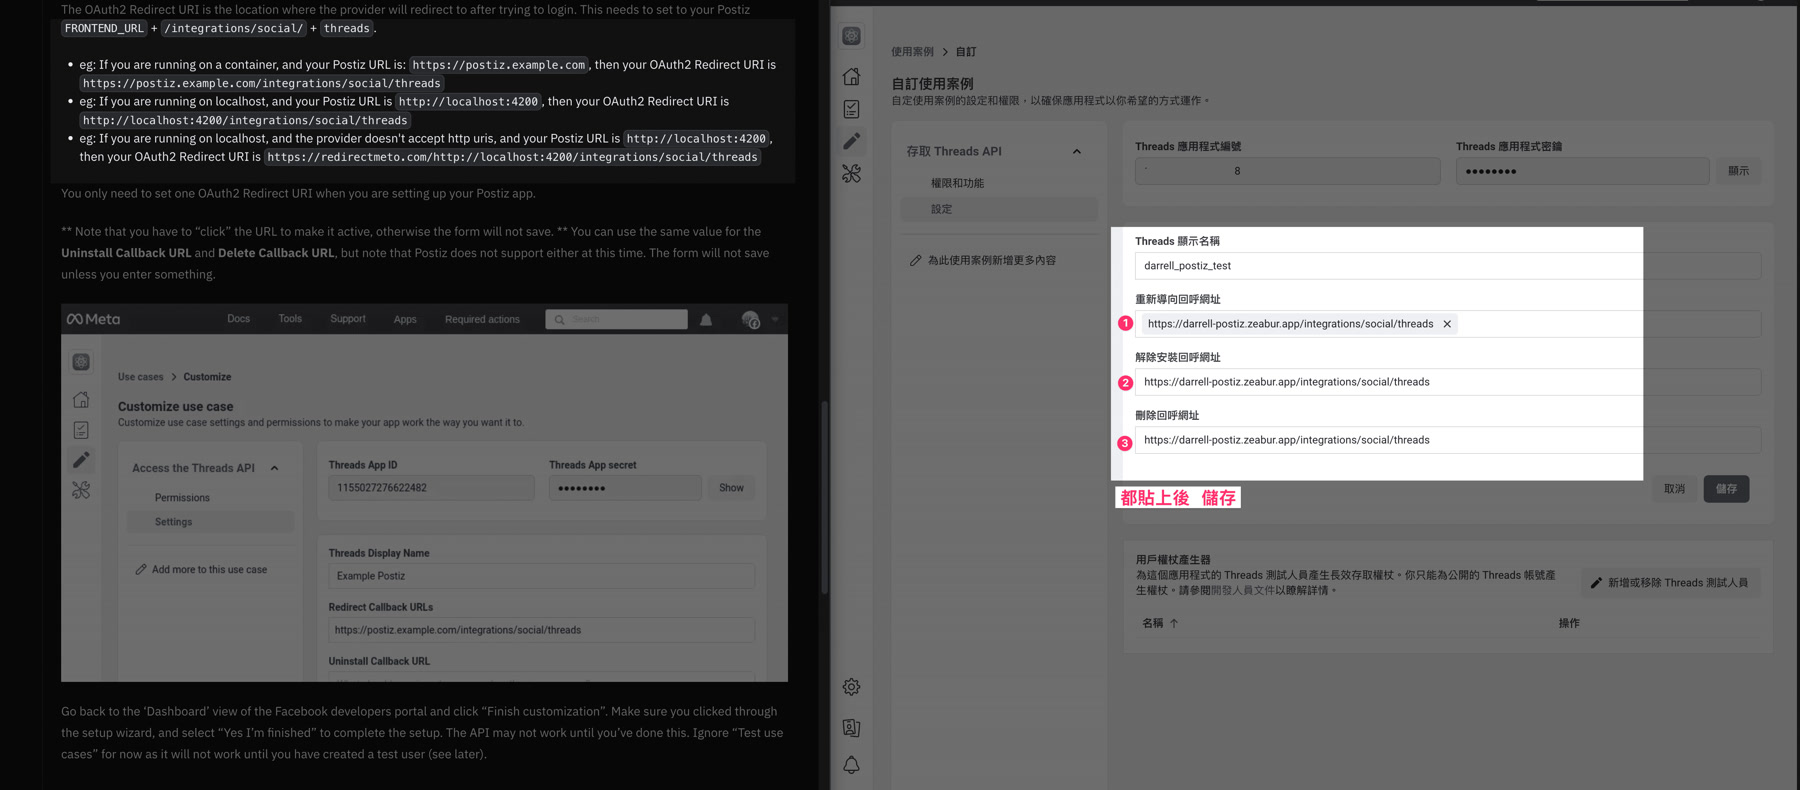
10. 設定 OAuth Redirect URL
根據你的 Postiz 部署 URL,需要設定正確的 OAuth Redirect URL 格式。
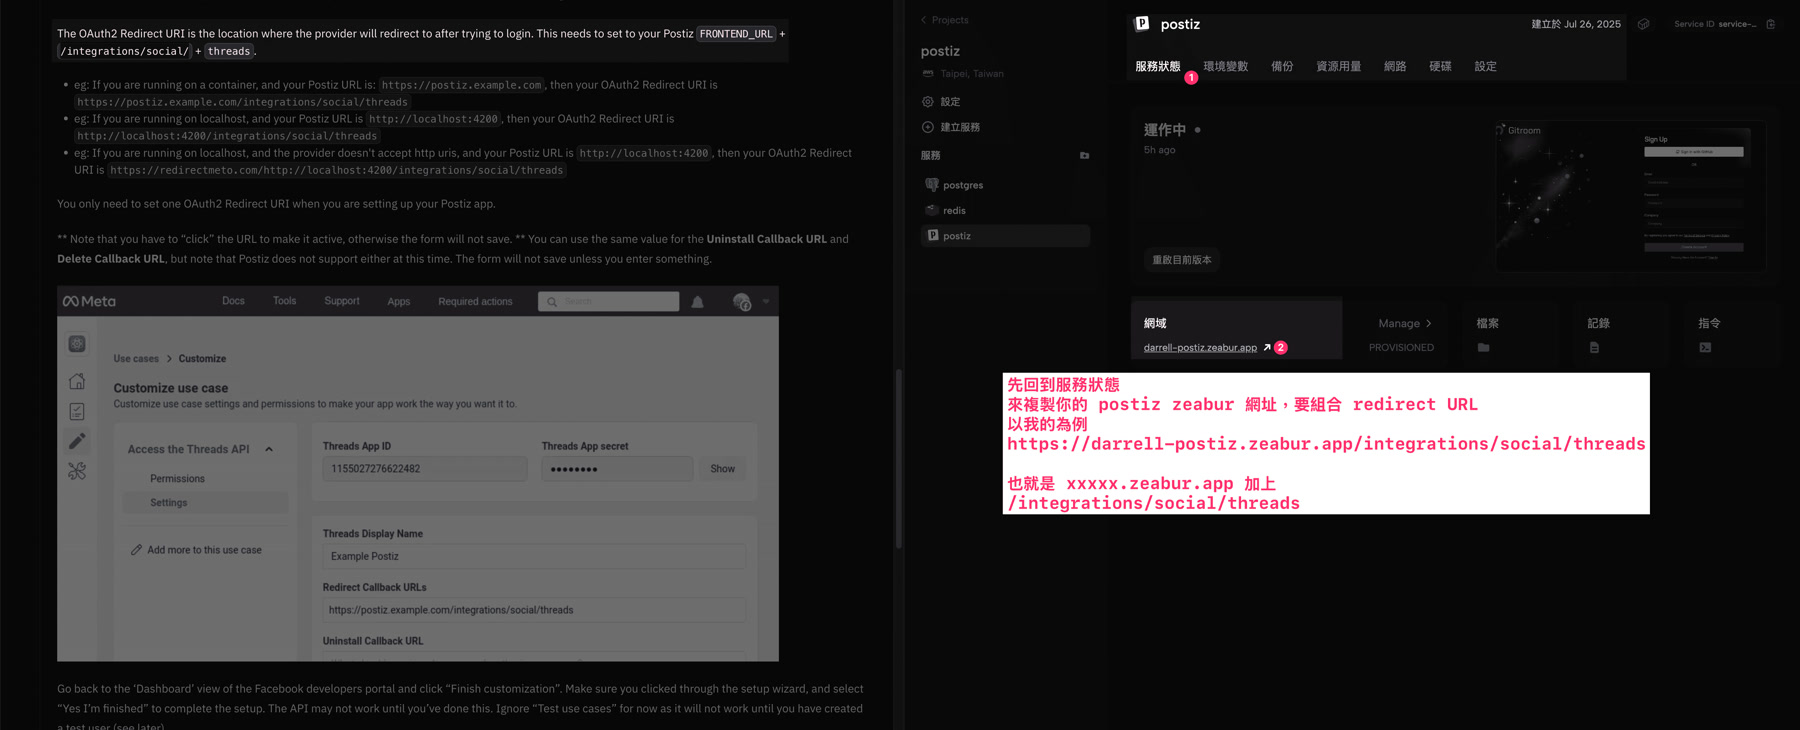
URL 格式通常是 https://你的域名.zeabur.app/integrations/social/threads,確保格式正確。
11. 在 Meta 輸入 Redirect URL 重新導向回呼網址
回到 Meta Developer,
重新導向回呼網址解除安裝回呼網址刪除回呼網址
欄位中貼上剛才的 URL。
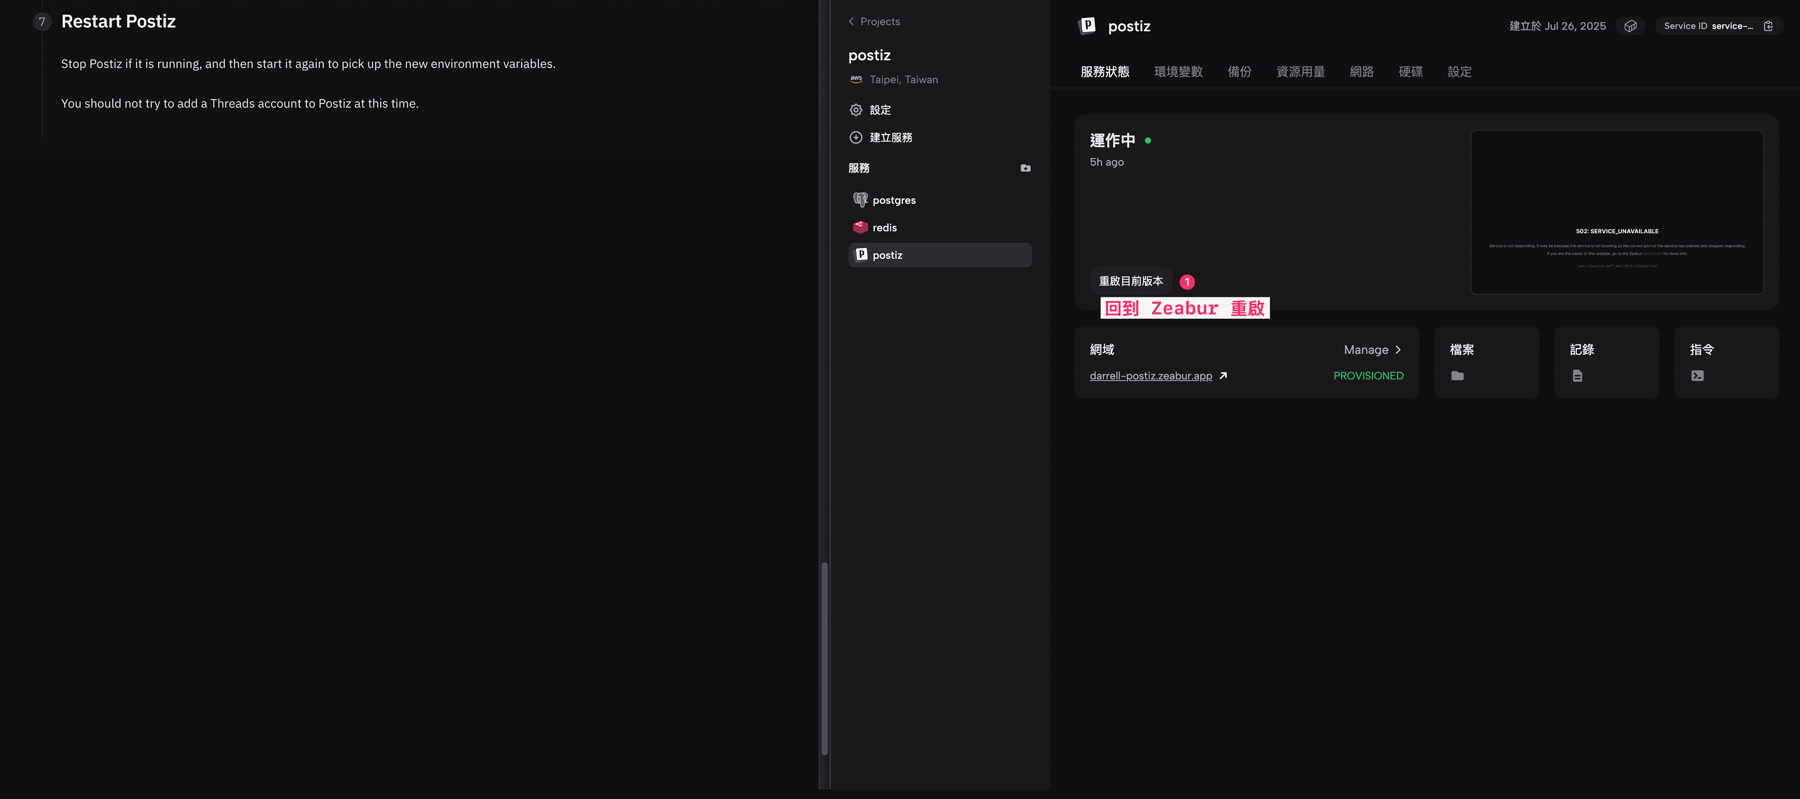
12. 在 Zeabur 重啟 Postiz
重啟後 Postiz 就能讀取到新設定的 Threads App ID 和 App Secret。
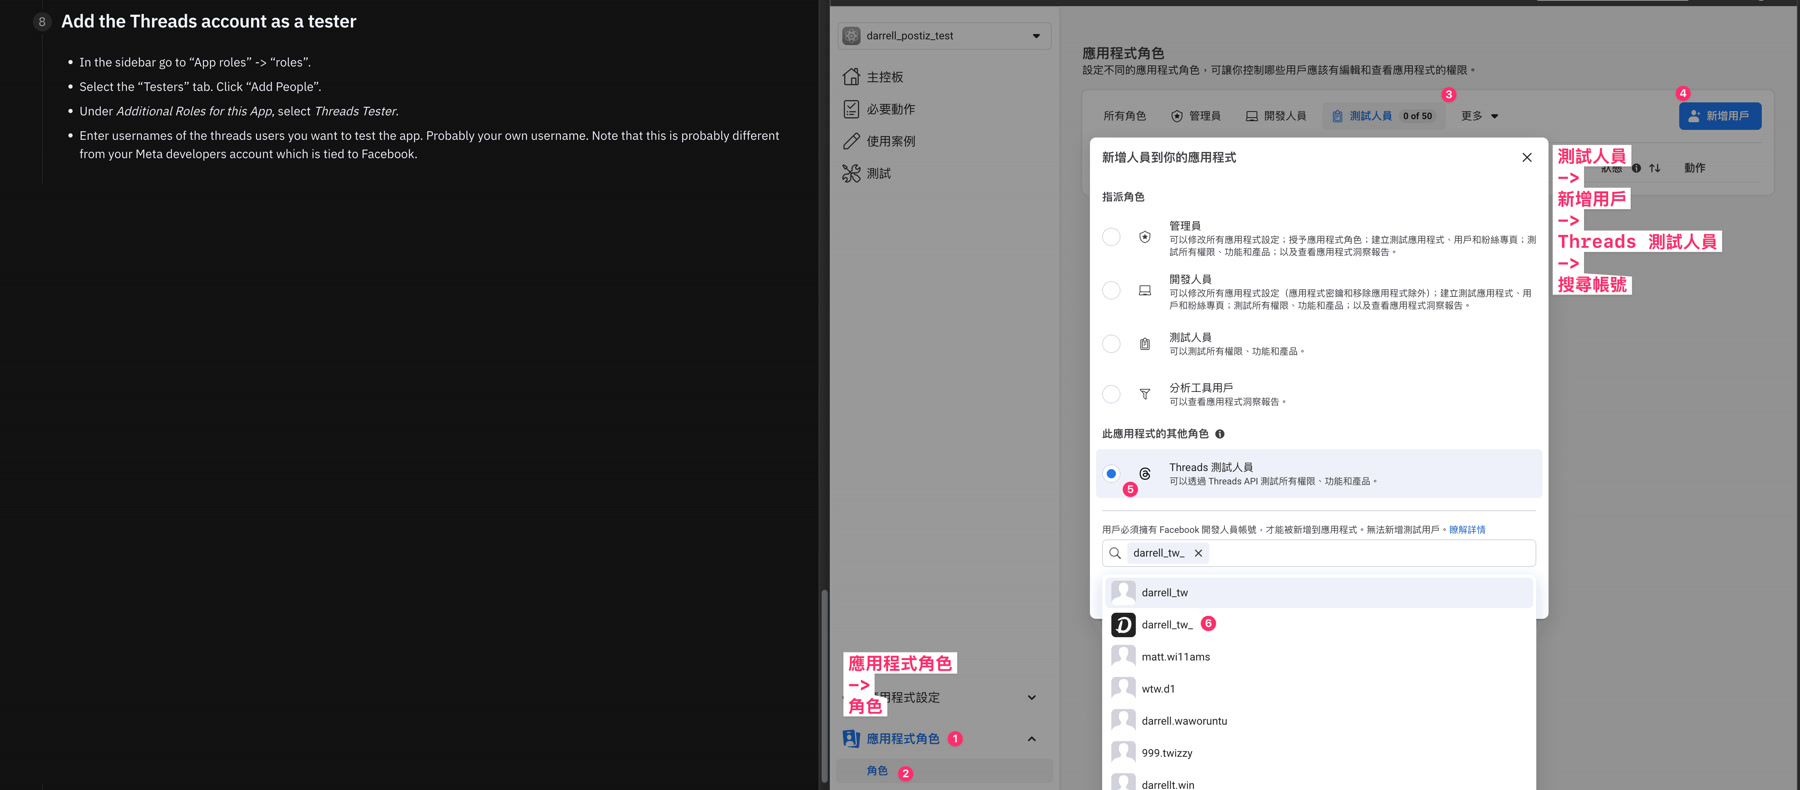
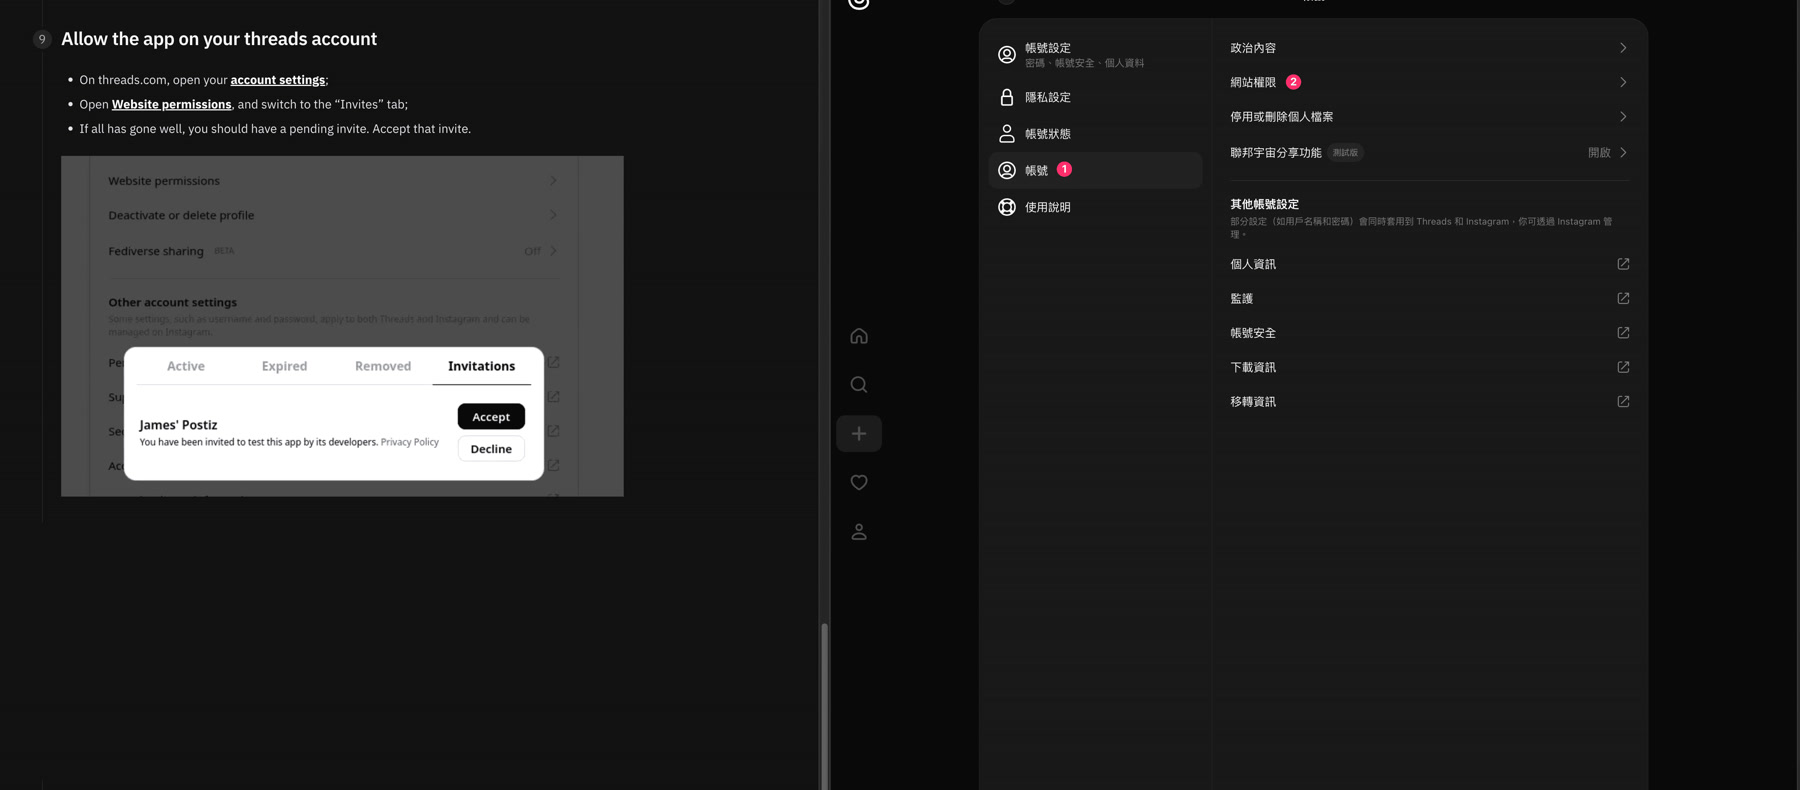
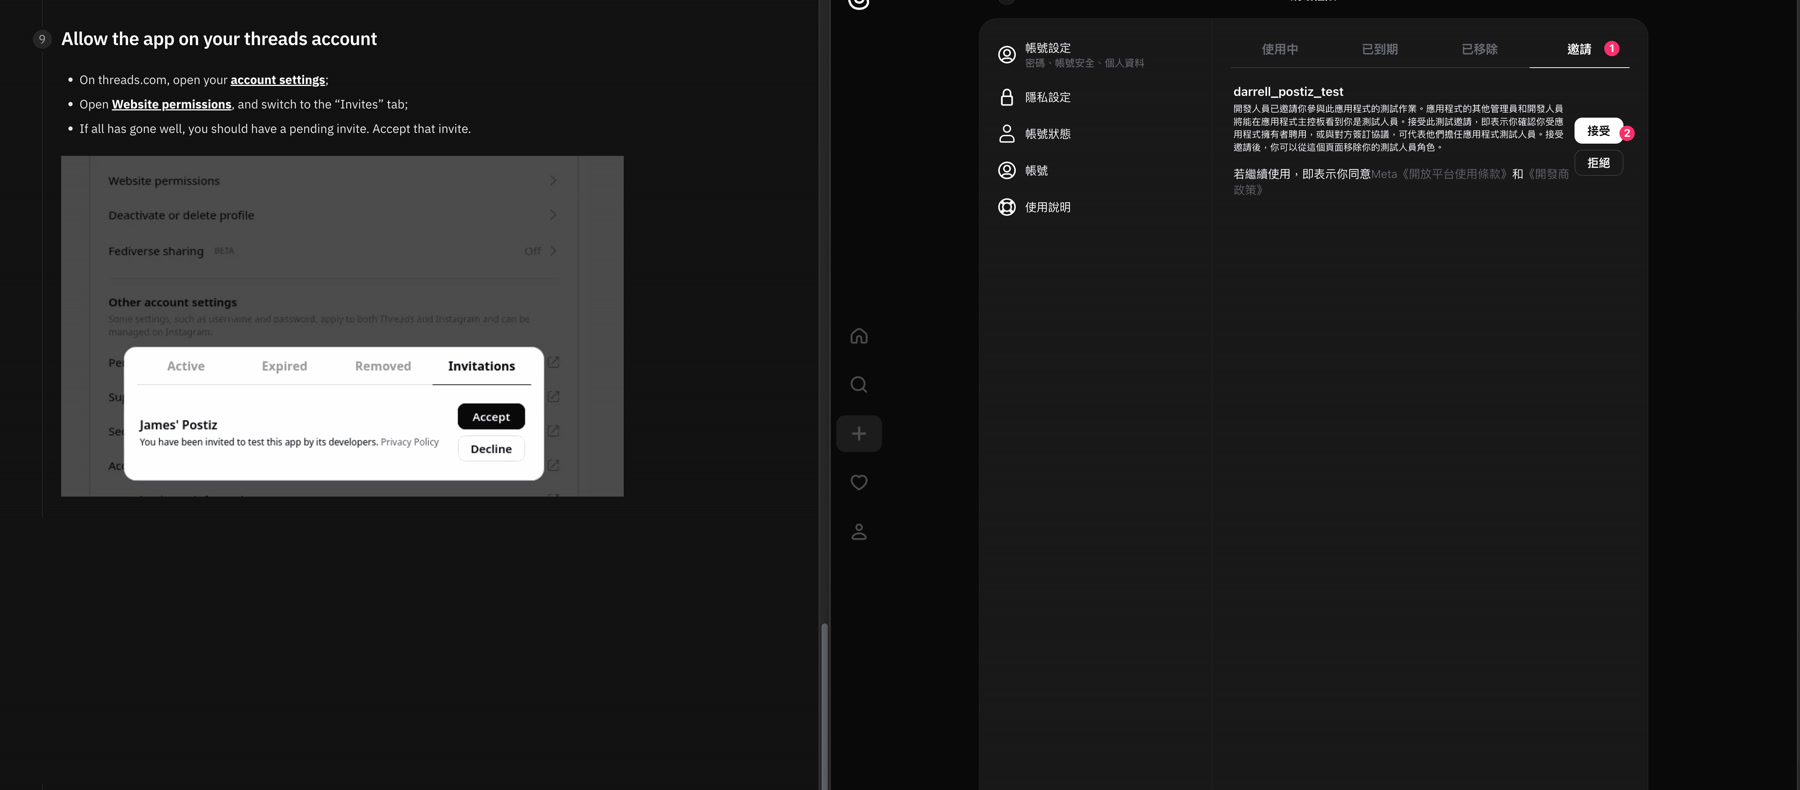
13. 發送邀請給測試使用者
在 Meta 開發者平台中,需要將你的 Threads 帳號添加為應用程式的測試用戶。
找到「Roles」或「App Roles」區域,點擊「Add People」並選擇「Threads Tester」角色。
14. 在 Threads 接受應用程式邀請
打開 Threads 應用程式,進入設定頁面,你應該會看到應用程式的邀請通知。
點擊「Accept」接受邀請,這樣就能讓你的 Threads 帳號與應用程式連結。
15. Postiz 行事曆介面
完成所有設定後,就可以正常使用 Postiz 了!你會看到熟悉的行事曆介面。
這裡可以安排你的社群媒體貼文時程,包含即將加入的 Threads 平台。
點擊左側的「Add Channel」按鈕,就可以開始添加各種社群媒體帳號。
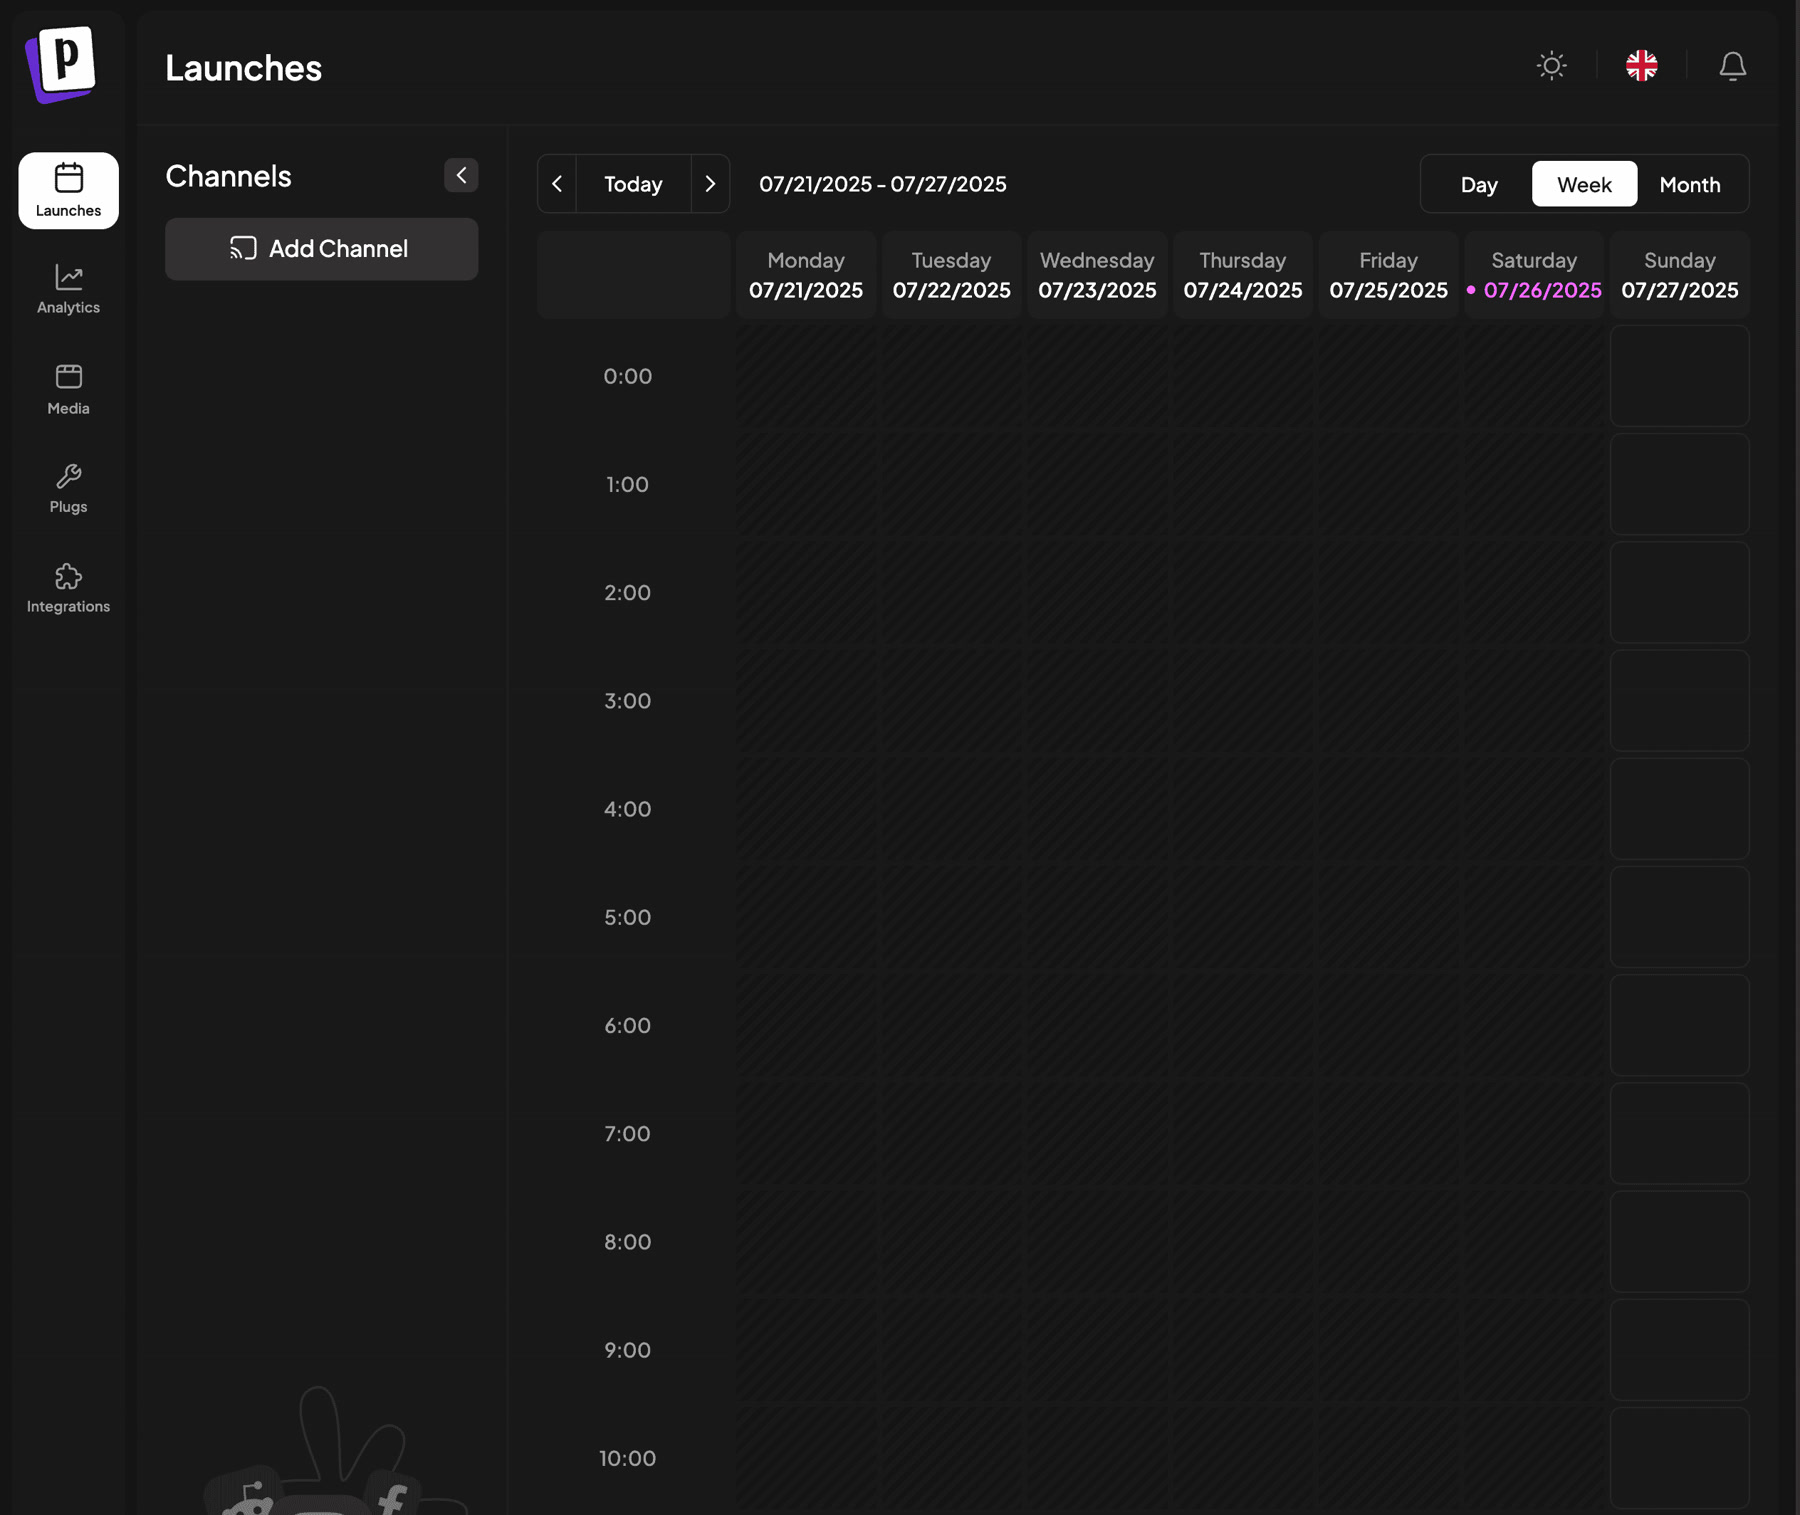
這個按鈕會開啟所有可用的社群平台選項,包含我們剛設定好的 Threads。
16. 在 Postiz 新增 Threads Channel
在社群平台選擇頁面中,選擇 Threads
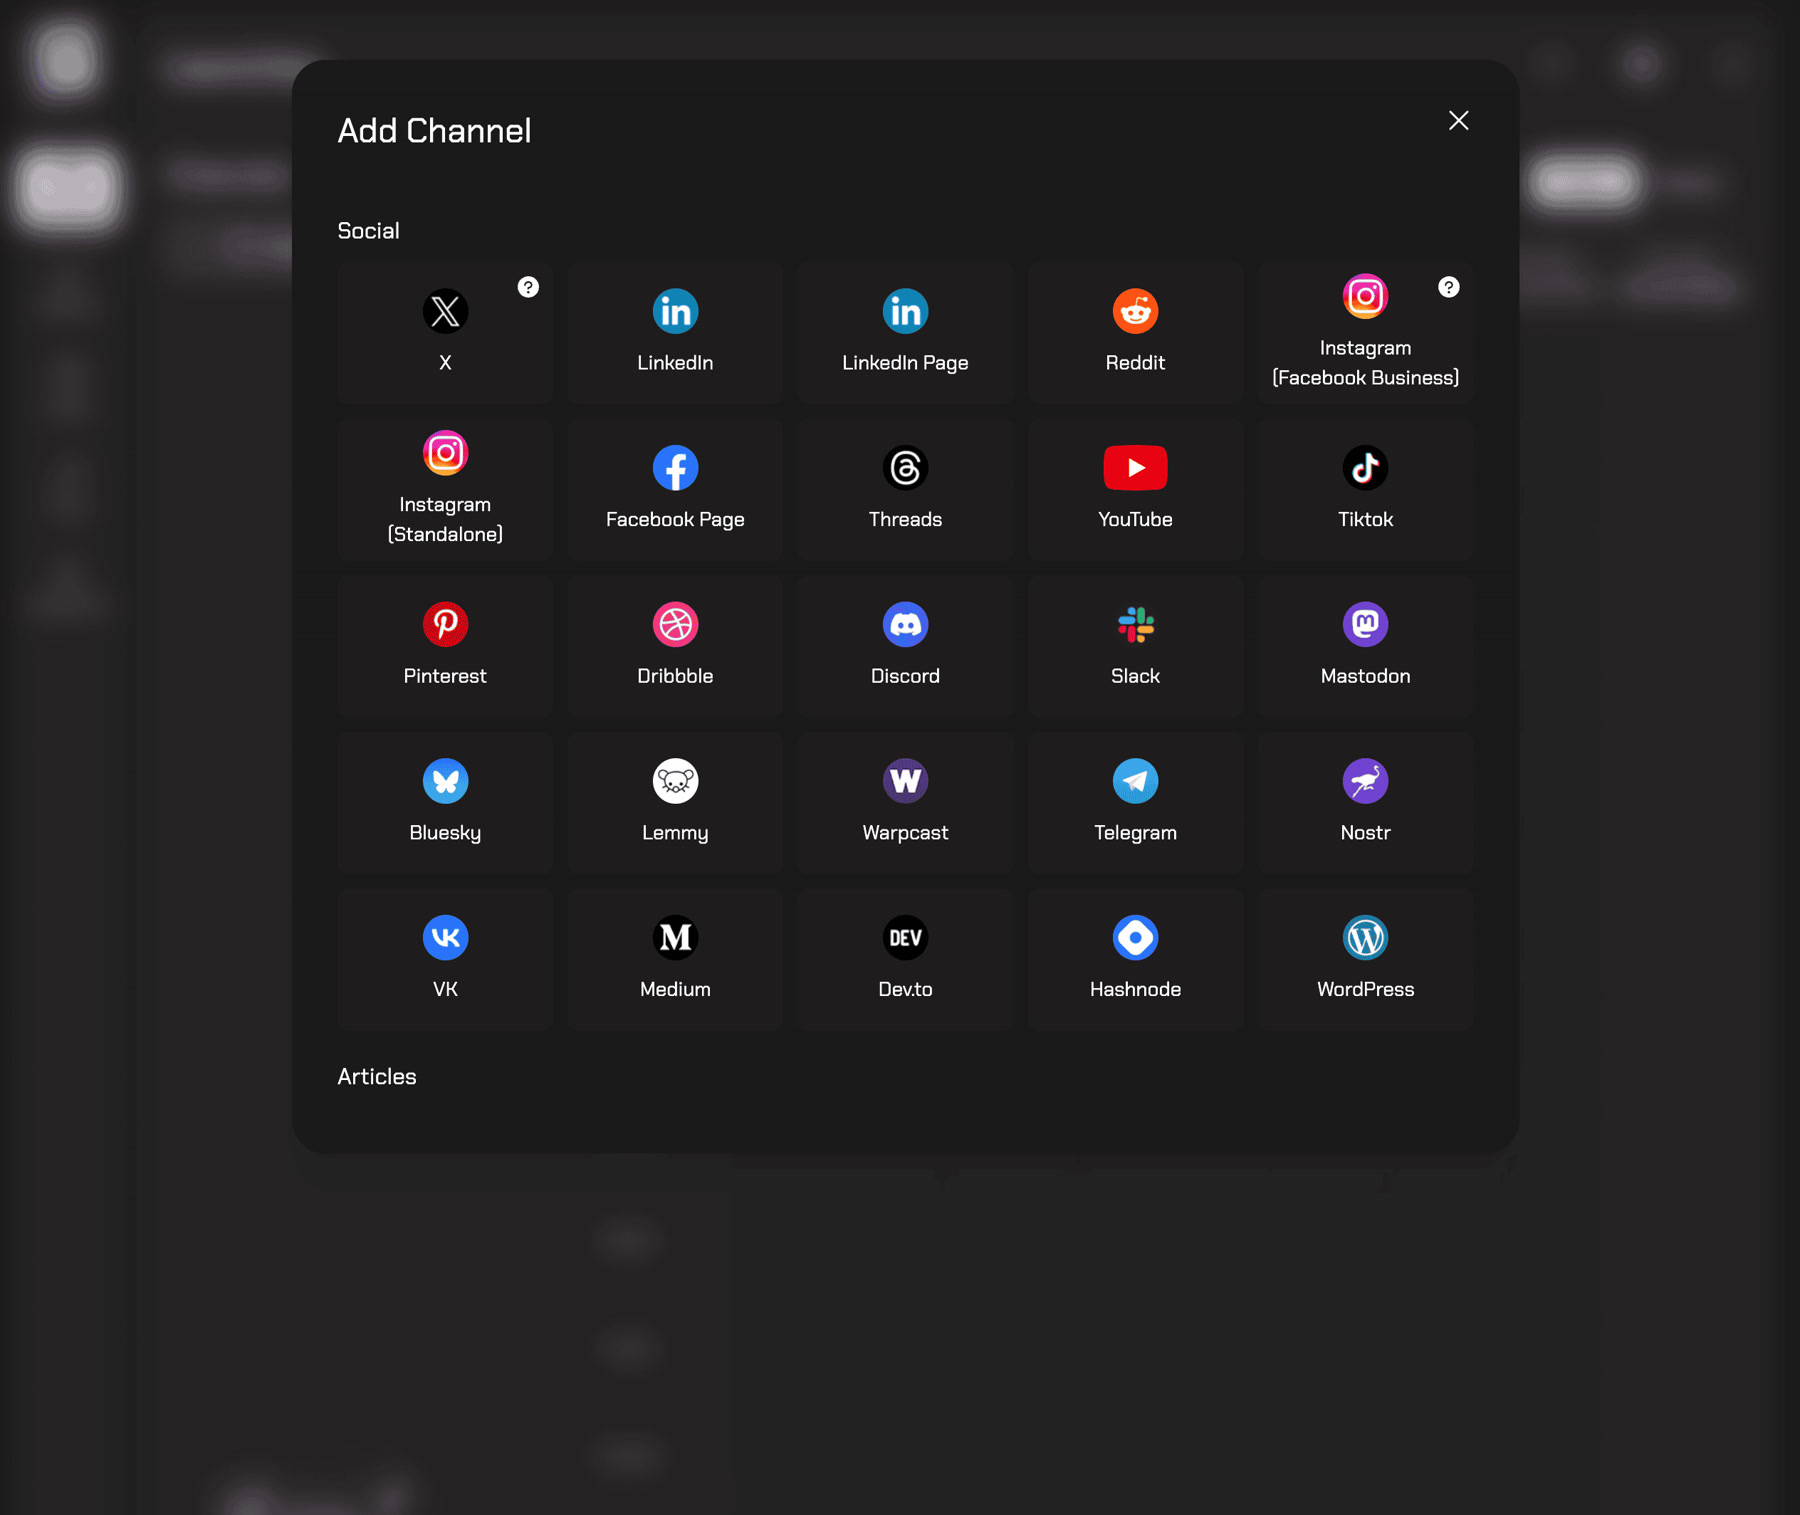
點擊 Threads 圖示就可以開始連接你的 Threads 帳號到 Postiz。
17. 完成 Threads 授權
最後會出現 Threads 的授權確認對話框,顯示應用程式要求的權限詳細內容。
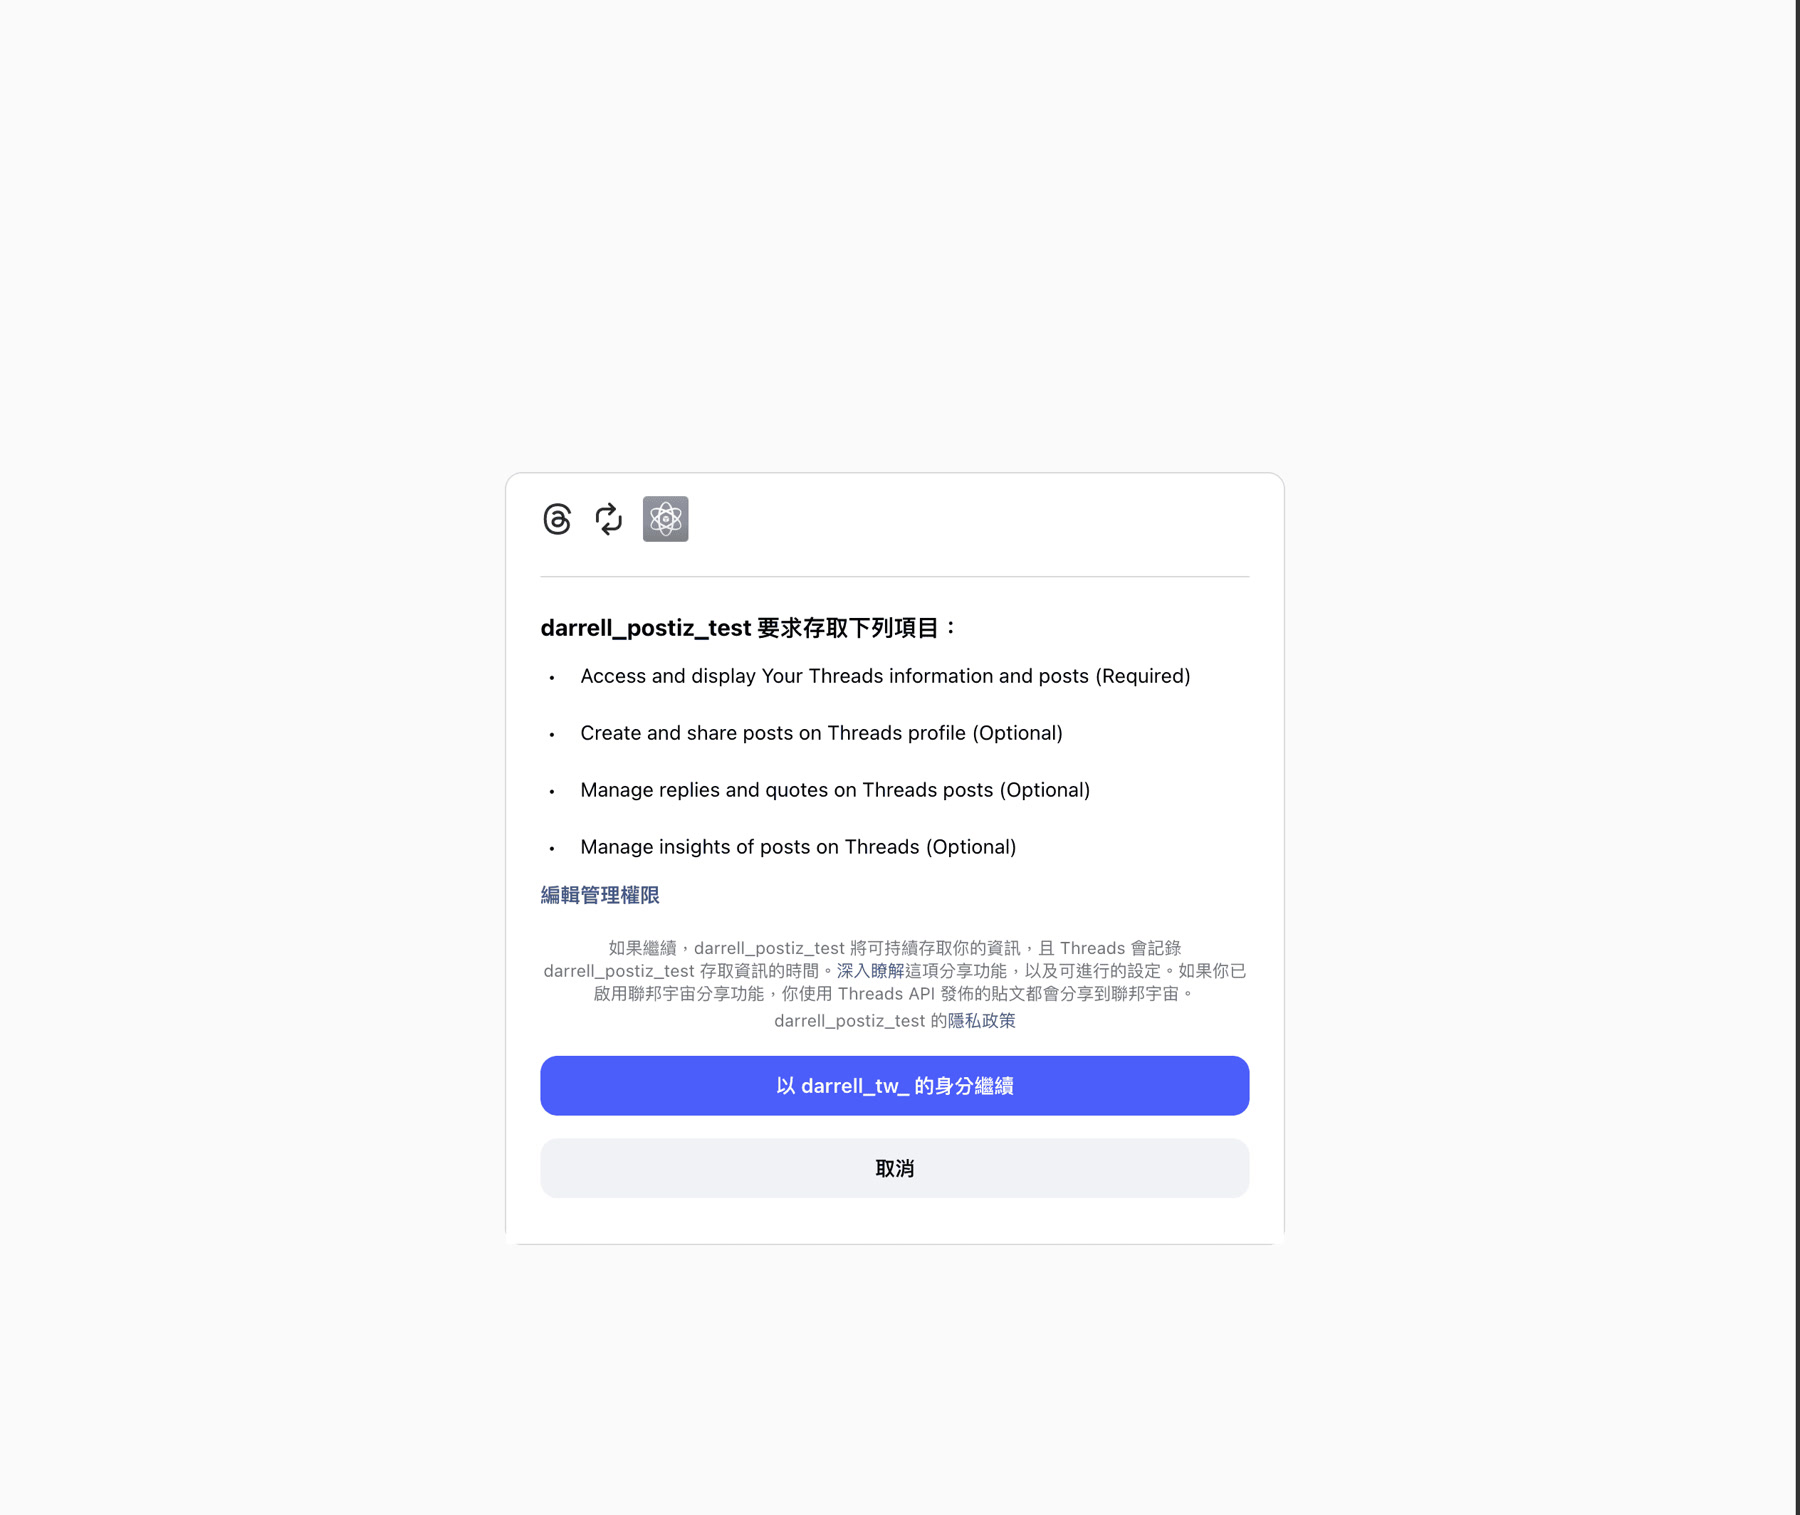
確認權限內容無誤後,點擊「以 xxx 的身分繼續」。
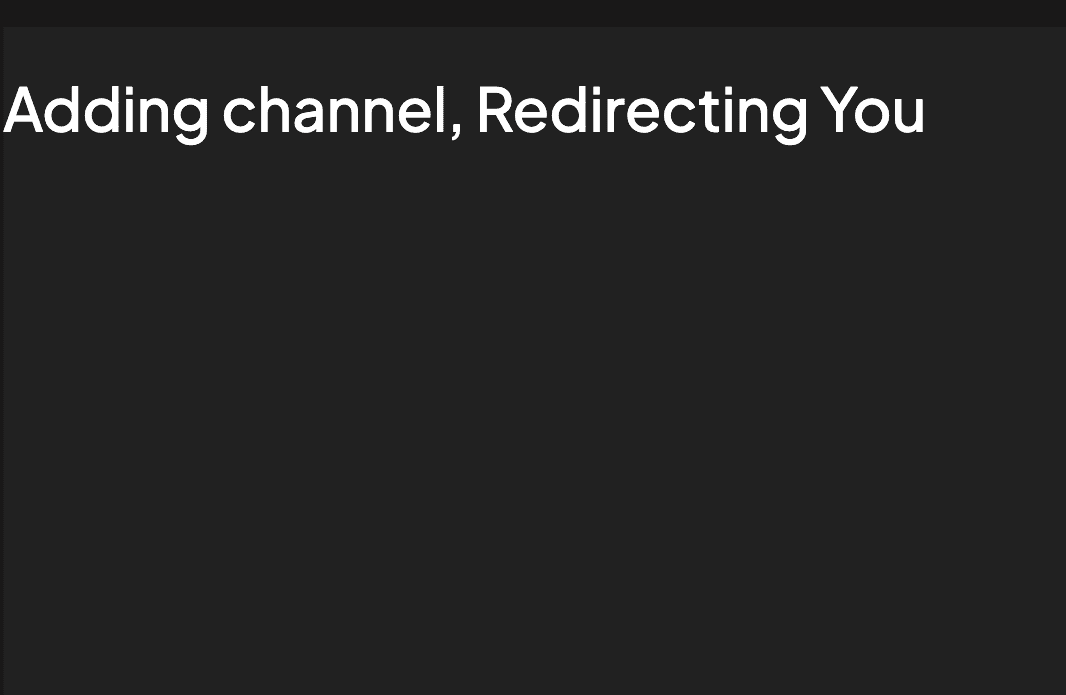
最後跳轉到 Postiz 有看到 Redirect you… 就代表串接成功!
Postiz 排程 Threads 貼文
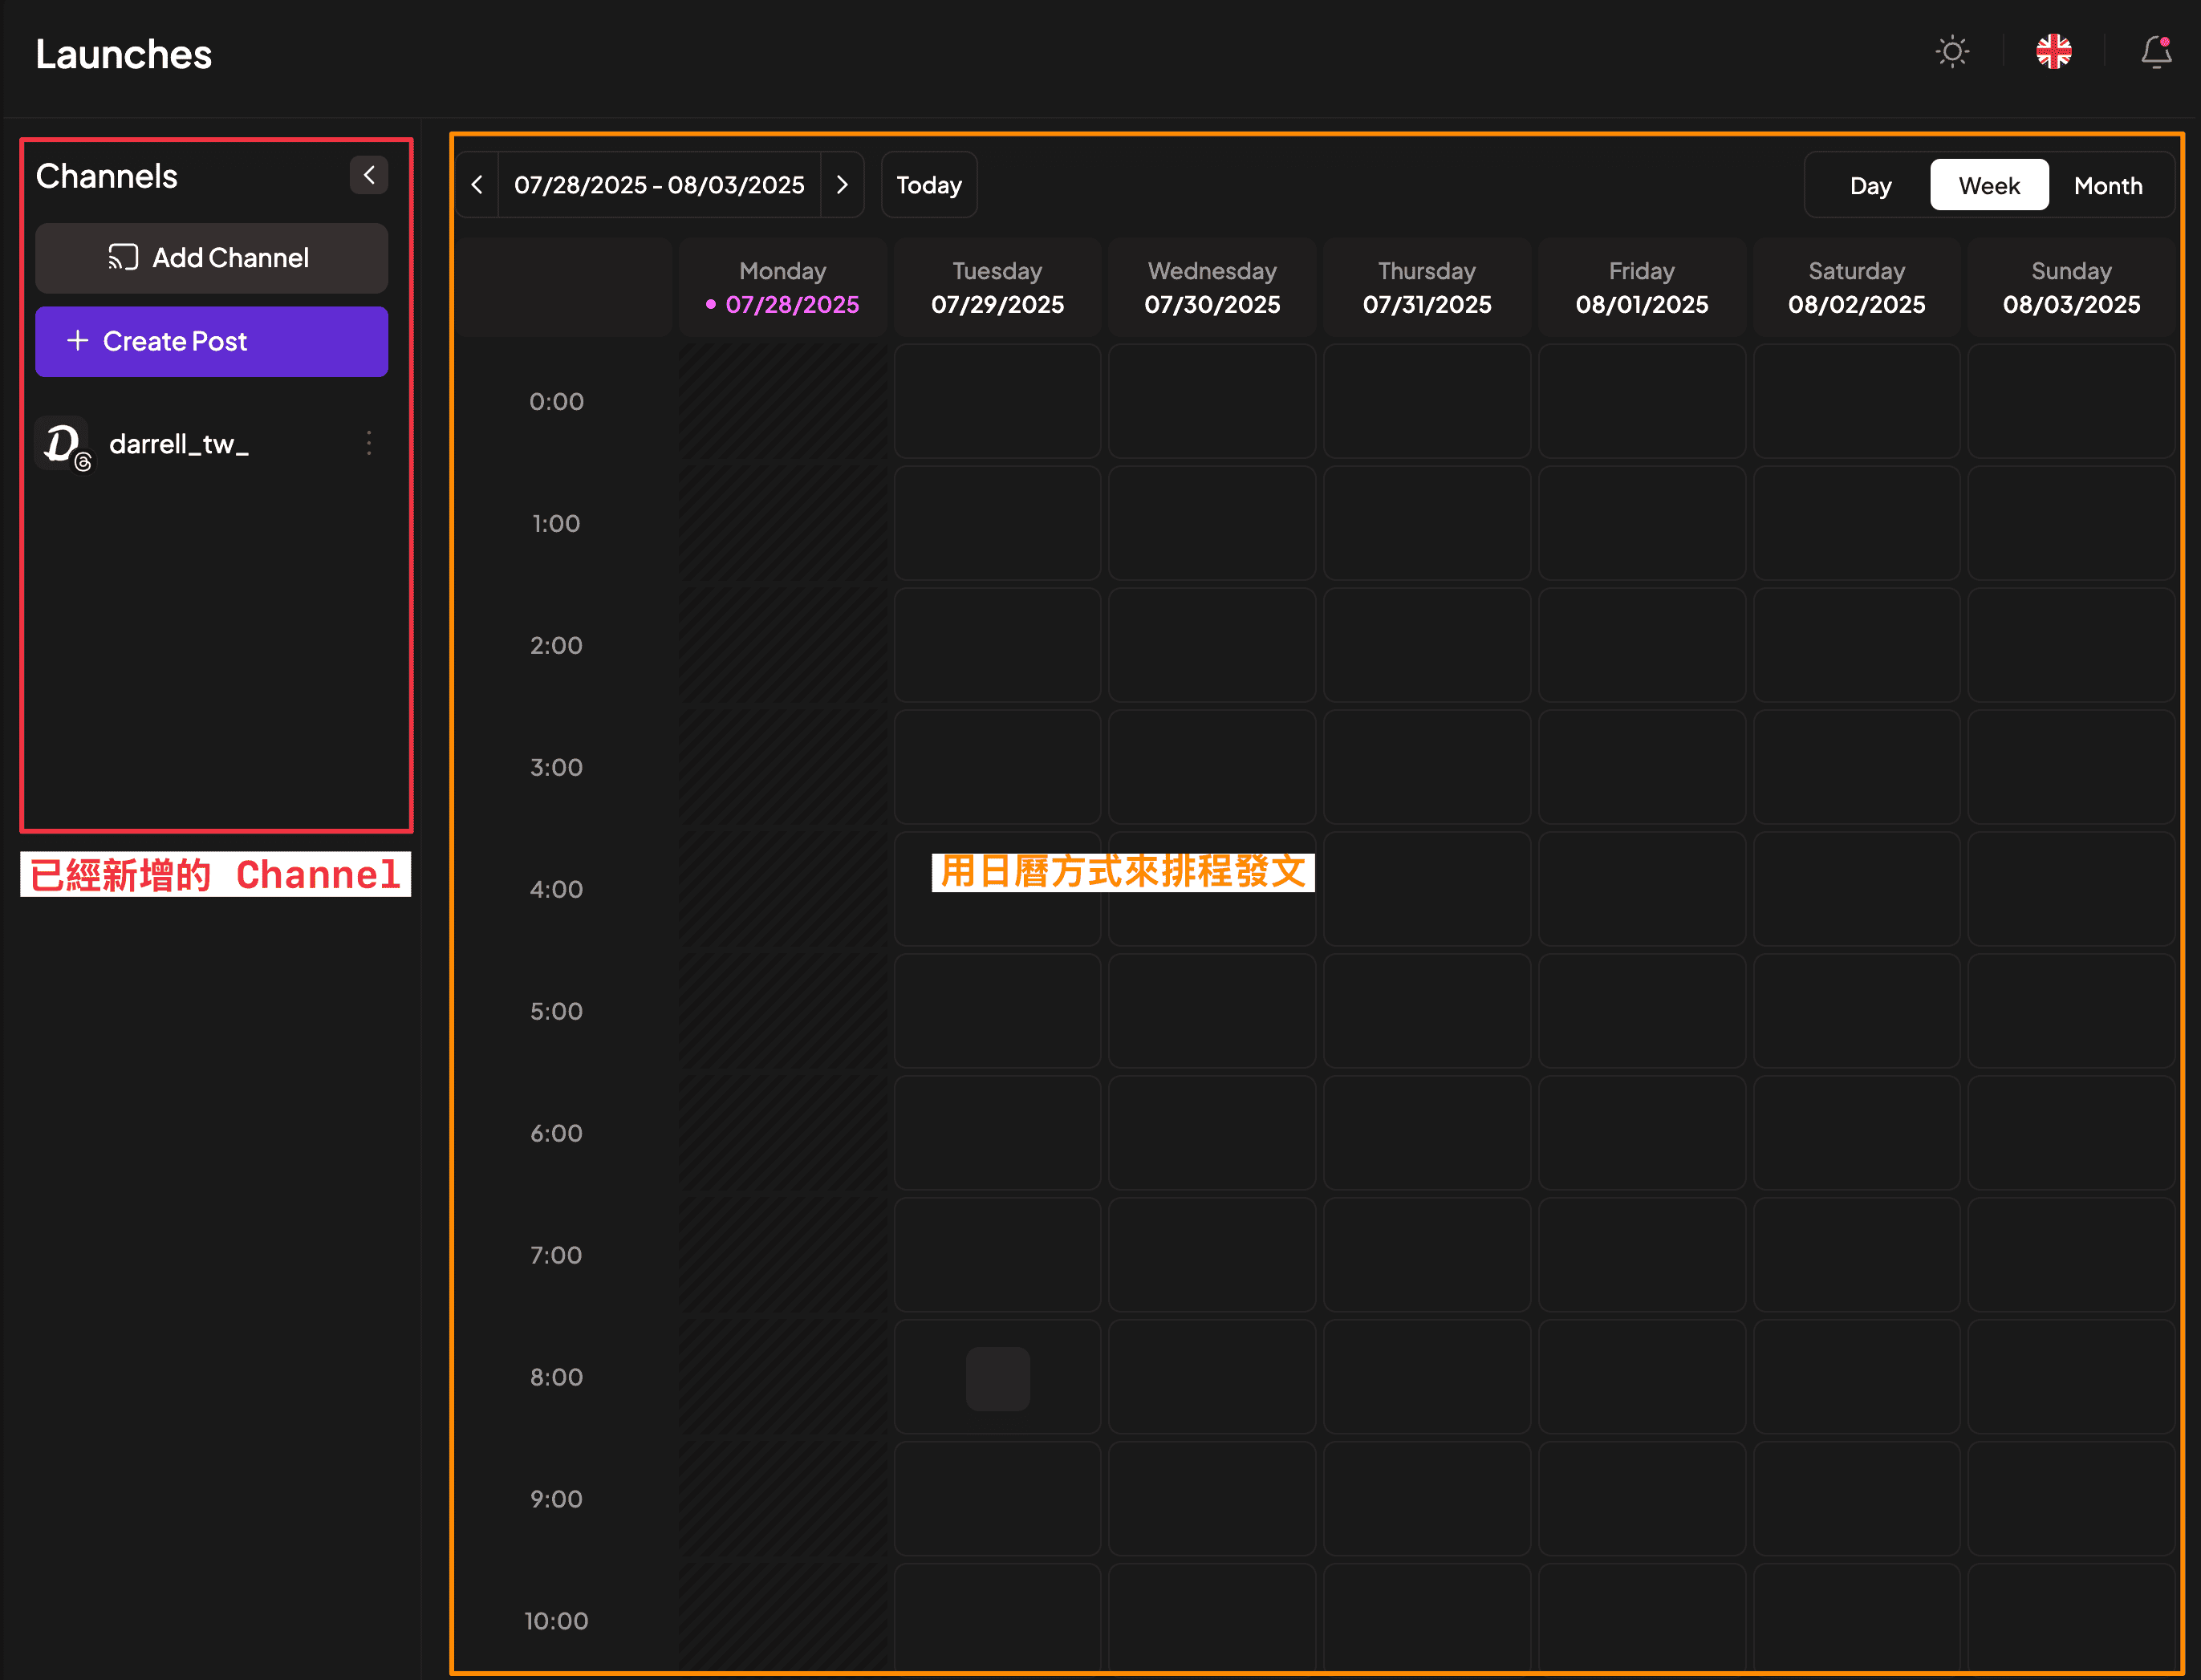
接下來介紹一下 Postiz 的介面,
左方是已經新增的 Channel,
右方的行事曆就可以直接來安排貼文跟看到已經排程的貼文
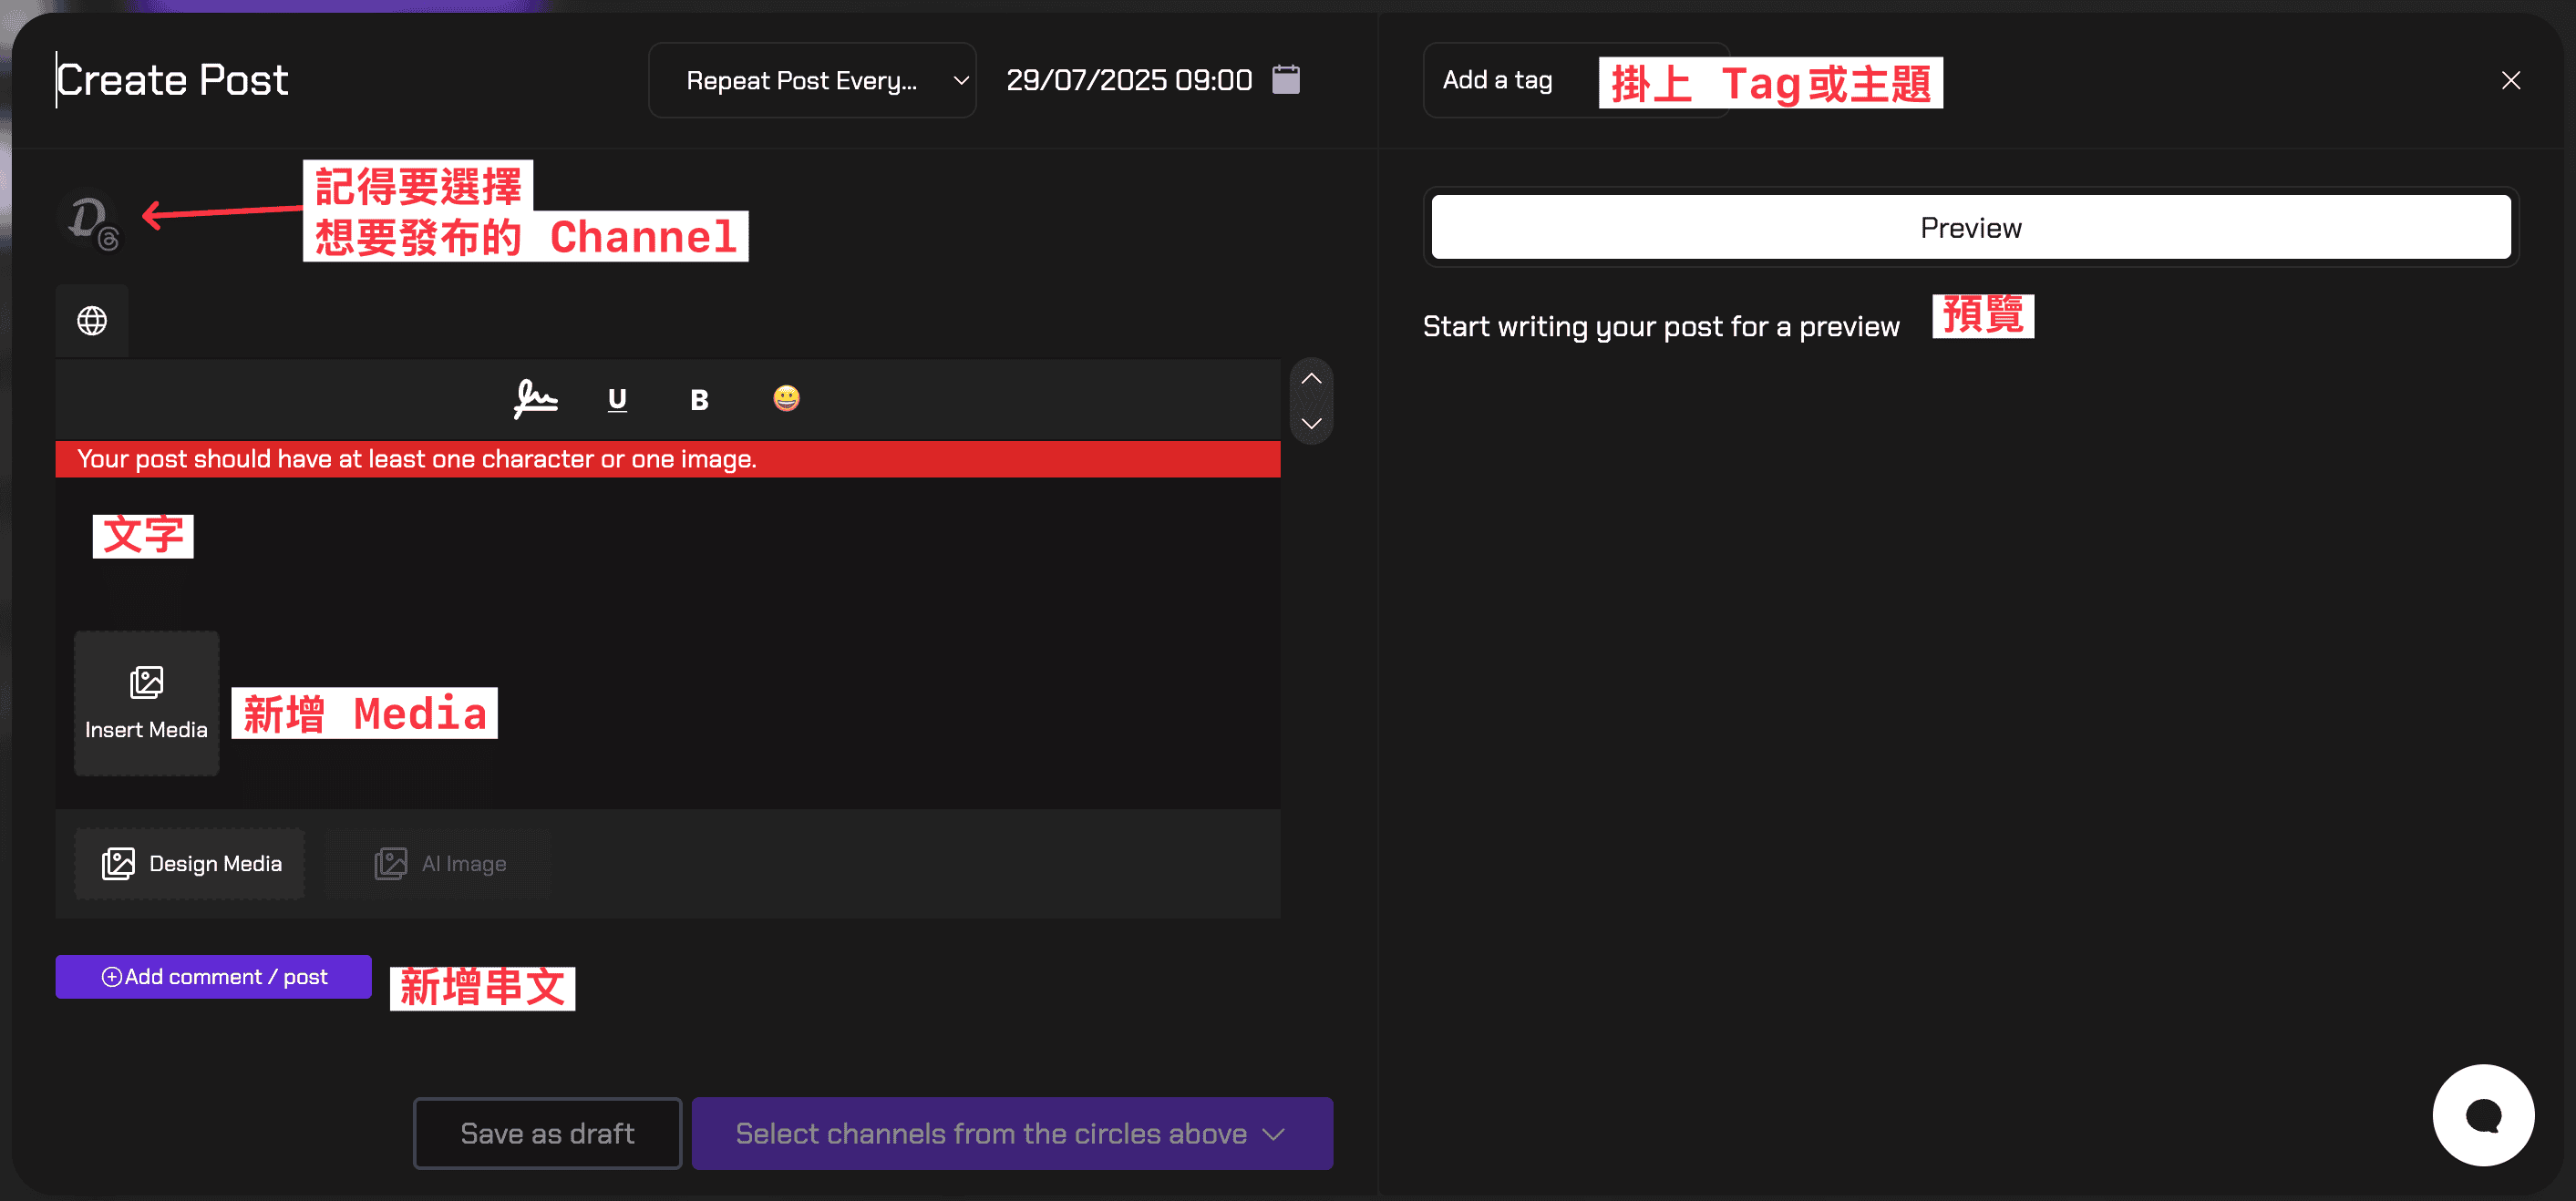
新增貼文
新增貼文的介面其實蠻簡單,
如果有用過 Buffer 那會上手很快
除了內容之外,Channel 還是要記得選,常常安排好內容後想說怎麼不能排程,
原來是忘記選擇要發佈在哪個 Channel
總結
目前還在測試開源的版本和雲端的版本功能差異性在哪,
也會看看 AI 功能如何加上!
請期待更新